|
the CEO! Creative Eternal Optimist! Blog
|  |
Monday, March 25 2013
I love bunnies! I had a favorite bunny about thirty years ago, Willoughby, he was white with black nose and ear tips. Housetrained he would also walk on a leash and growl at the cats!
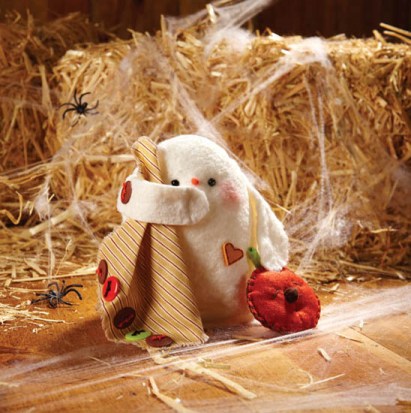
I have made many bunnies these past few years, needle felted, fabric, felt and clay. For the Smoothfoam blog I created a bitsy bunny with ACTIVA Hearty airdry clay. Quick and easy requiring just a foam egg and clay plus a few embellishments. He seems to have forgotten something!

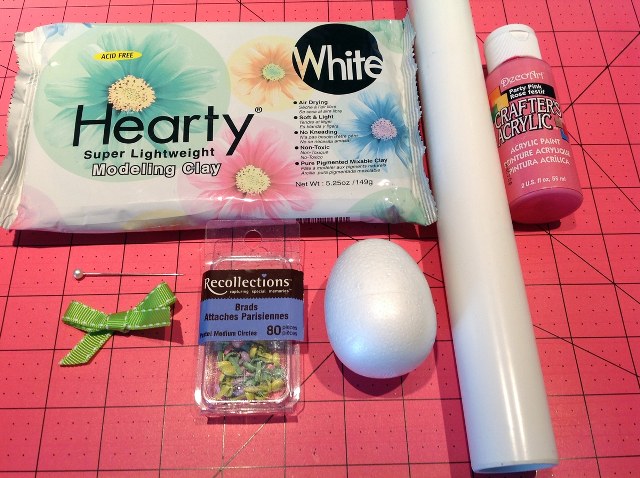
You will need:
3"Egg of Smoothfoam
1 pkg of Hearty Clay by ACTIVA
Brads by Recollection
12" piece of green ribbon
Party Pink Acrylic paint by DecoArts
Clay roller
(Pin, knife, ruler, plastic cup, craft mat, ziplock bag)
1. Break off 1/3 of packaged clay. Cut in half. Roll out one half for bunny body. Break off other half into five pieces.
2. Shape four pieces into long ovals for the feet and paws. Shape last piece into a rough ball for tail.
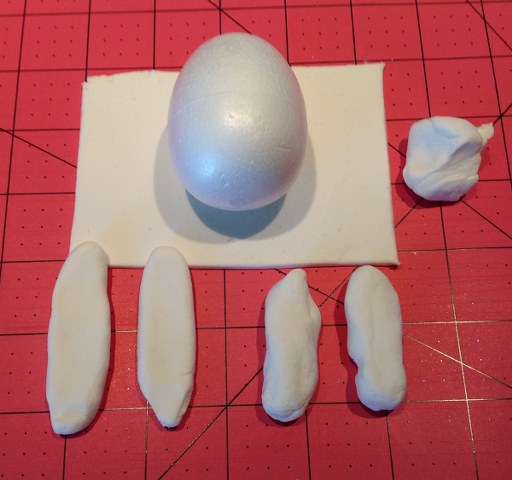
3. Wrap flat rolled piece of clay around egg, smooth and remove excess. Use finger dipped in water to smooth seams.
4. Refer to finished photo and insert eyes, nose, tummy brads into body. Use pin to make a hole if needed. Make eyelash, mouth marks with pin.
5. Attach paws and feet. Dip finger in water and smooth seams. Arrange paws in place. Add tail to back so bunny stands easily.
6. Break off another piece of clay for ears, make two long ovals flattening them in center. Place a drop of pink paint on mat. Wet finger and touch paint, rub lightly along center of ears. Repeat for cheeks.
7. Attach ears to top of head. Dip finger in water and smooth seams. Tie and add bow with a brad to top of head.
A package of clay will make a couple more bunnies or a batch of eggs, color easily with markers or paints. Keep hopping in National Craft Month and find all kinds of fun projects on the Smoothfoam Blog! 
Monday, November 05 2012
The first Monday of every month the Designer Crafts Connection hops with thirty of the Craft industry's top designers. We are all professional designers, members of the CHA designer section. (Craft & Hobby Association)
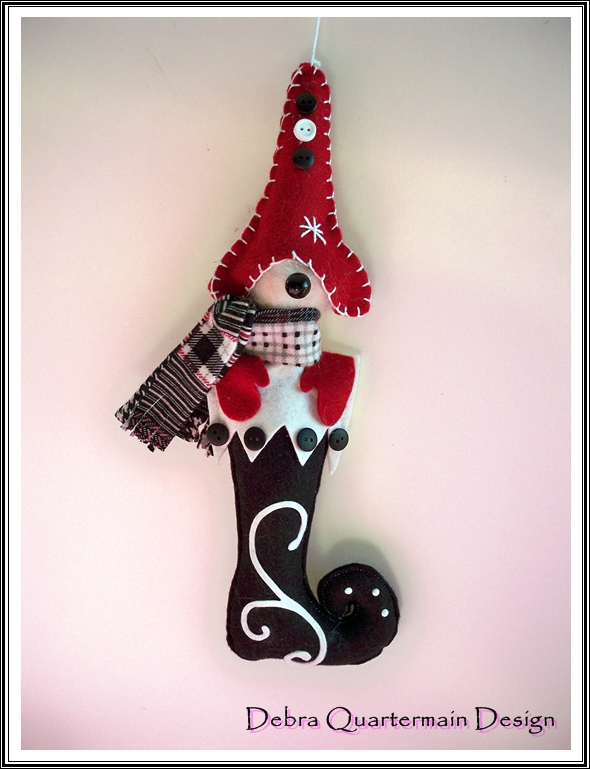
This month's theme is thank you gifts. November marks the beginning of the holiday season, invitations to holiday parties, gatherings, gift exchanges. My favorite thank you gifts to give are handmade ornaments. I design and create new ones each year. One of my favorite designs is this whimsical elf popping out of a stocking. I create them in different color combinations to match the gift recepient's holiday decor.
The elf's head is a needle felted 1 1/2" Styrofoam brand foam ball and the stocking is made National Nonwoven's wool felt. The scroll design on the stocking die cut with the Sizzix Big Shot. It cuts felt beautifully. Bead and button embellishments complete the ornament.
Be inspired with the projects offered by the other members of this talented designer group, just hop along with the DCC button in the side bar!
Monday, October 01 2012
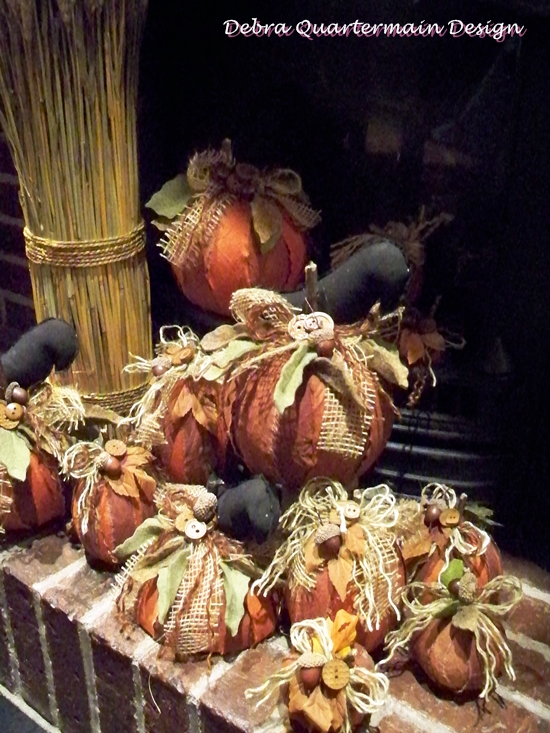
Create your own Prim Pumpkin Patch, easy peasy fall decor
using Rit Dyes and STYROFOAM Brand foam balls.
Using two colors of Rit Dye, Tangerine and Dark Brown
I dyed sections of unbleached cotton,
Blumenthal Lansing nylon buttons and twine.
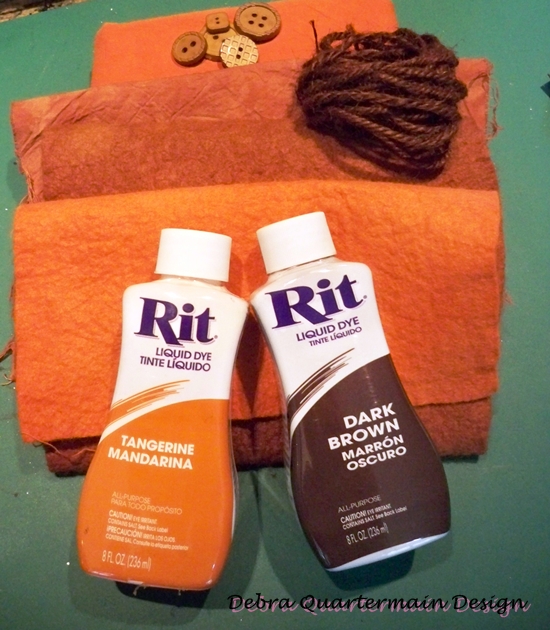
Follow the stove top dye technique
http://www.ritdye.com/dyeing-techniques/stovetop
and dye a 12" x 36" strip of unbleached cotton
with 1 cup Tangerine, 8 cups of hot water. Remove strip from dye,
add 2 T of Dark Brown to pot with Tangerine, stir well.
Dye two more strips of unbleached cotton along with buttons and twine.
Remove one strip along with twine and buttons.
Add anotherTbs of Dark Brown and stir with third strip in dye.
A mottled effect and darker shade will result. Wash and dry fabrics.
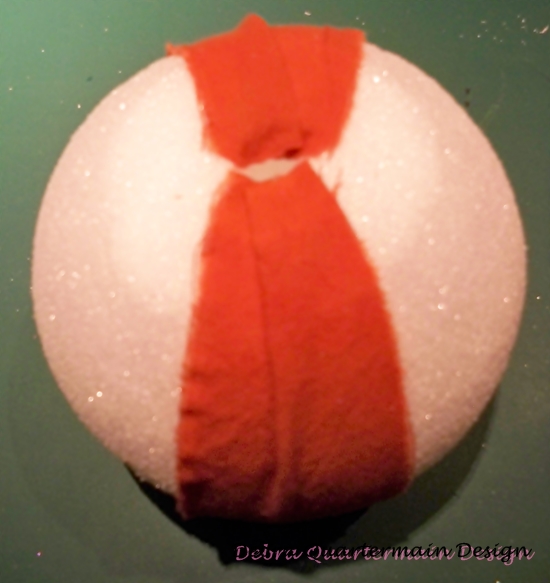
Use any size ball you wish to, I used several sizes from 3" to 5".
With a stick carve out a small middle hole for stem.
Glue stem in place. Rip fabric strips into 2" widths.
Begin gluing end of strip by hole. Wrap NSEW going around stick.
Trim off excess and contiinue with next piece.

Add third color of strip filling in all gaps.
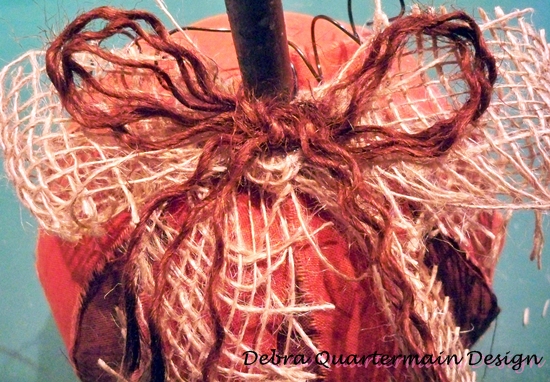
Embellish with bows and buttons.
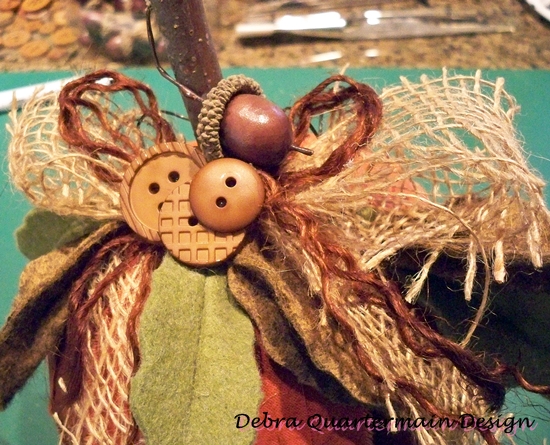
Sew crow and don't turn right side out. Stuff and sew or glue opening
Paint crow with black craft paint. Let dry. Insert and glue into Pumpkin.

Glue some felt leaves in among burlap bow.
Glue and insert bird! To follow along on the hop
just click on the Designer Crafts Connection Blog Hop Button!
12 of our DCC designers will be taking part in another blog hop
beginning Saturday October 13th featuring Makin's Clay.

They will be giving out for the blog hop....
a prize package worth just over $100 retail cost.
In order to enter go to the Makin's Clay Blog
and leave a comment. Here is the link!
http://makinsclayblog.blogspot.com/2012/09/makins-clay-blog-hop-contest.html
Get inspired with some great clay ideas and enter for the pirze!
Happy creating!

Monday, June 25 2012
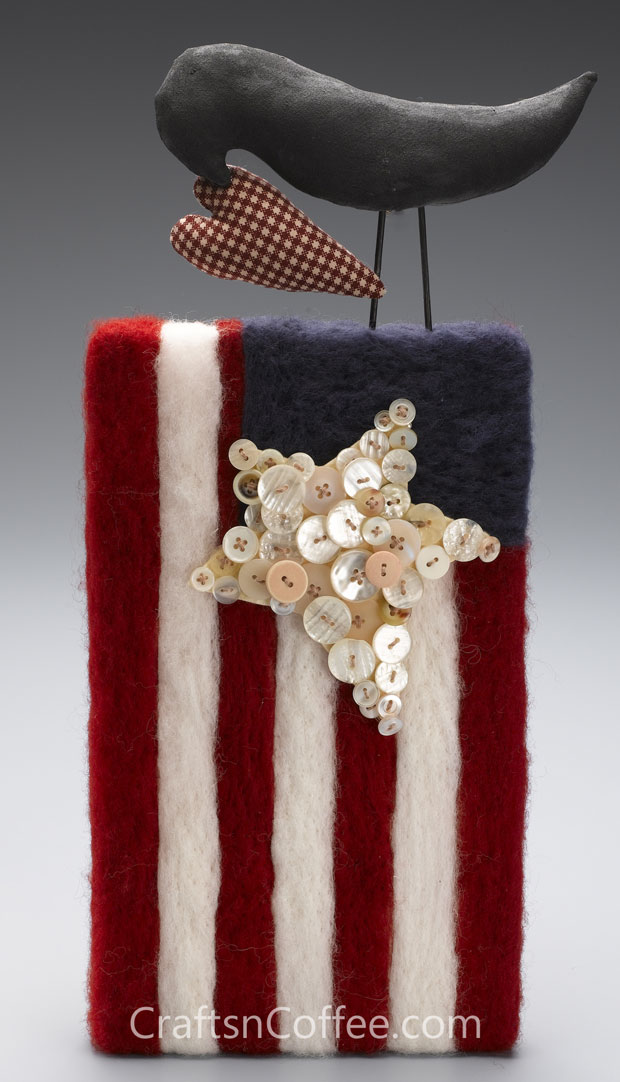
Needle felting with Wool Wisps from National Nonwovens and Styrofoam Brand foam is one of my very favorite techniques. The above design I created for the 4th of July can also be adapted very easily for the Canadian July 1st celebrations. Photo courtesy of and complete instructions are available at CraftsnCoffee.com.
Crafty happenings, the talented and divine Ms. Margot Potter is on the new TLC Craft Wars show hosted by Tori Spelling. Can't wait to see her! Trailer promo http://tlc.howstuffworks.com/tv/craft-wars/videos/on-the-craft-battleground.htm
Have a creative week! Follow the Joy! 
Friday, June 08 2012
The birds are singing about a great giveaway for the DCC Designer's Blog Hop. Hop on over to Julie McGuffee's blog to get the details and have some fun! Happy Friday!
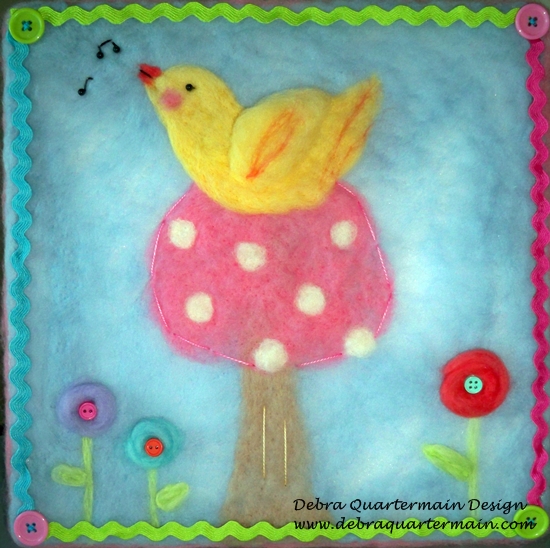
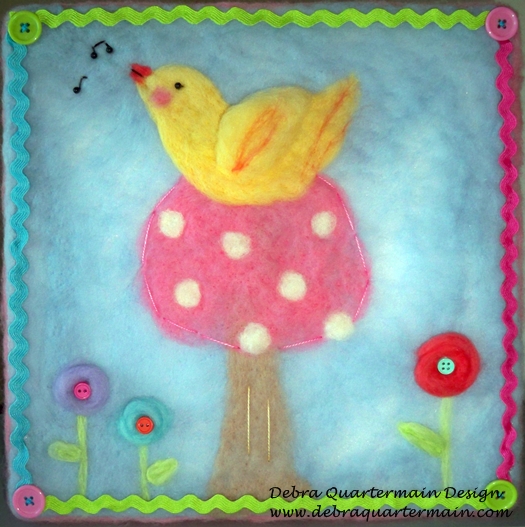
Happy Spring! The birds do sing from the treetops with JOY! This one of my favorite pieces, the technique needle felting is fun, easy and relaxing.
Delicious vibrant wools from National Nonwovens, pen needle tool from Clover, a sheet of STYROFOAM Brand foam, Wrights ricrac and buttons from Blumenthal Lansing.
Creating with JOY, never forget to just create for the sheer pleasure, the relaxation of hand, heart and mind engaged in creating! Follow the JOY always! 
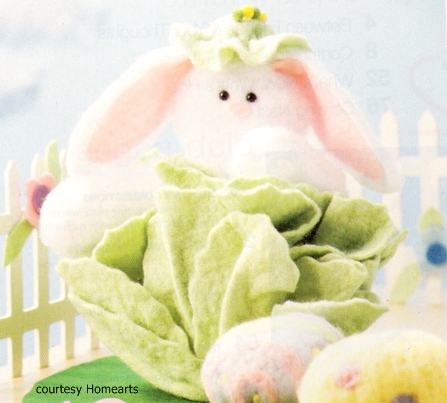
Friday, April 06 2012
Easter is a favorite holiday of mine, the pretty cotton candy colors, cute bunnies and chicks oh and of course the chocolate! Even though my girls are grown up we still have an Easter egg hunt although this year I was thinking of hiding Keurig cups as they both enjoy their coffees!
Over the years I have designed many bunnes which have been published in a variety of magazines. So in honor of the holiday, here is a roundup of some of my favorites. To go along with the bunnies, Crafts 'n Coffee is having a week of Eggstravaganza projects! Enjoy!

Friday, March 09 2012
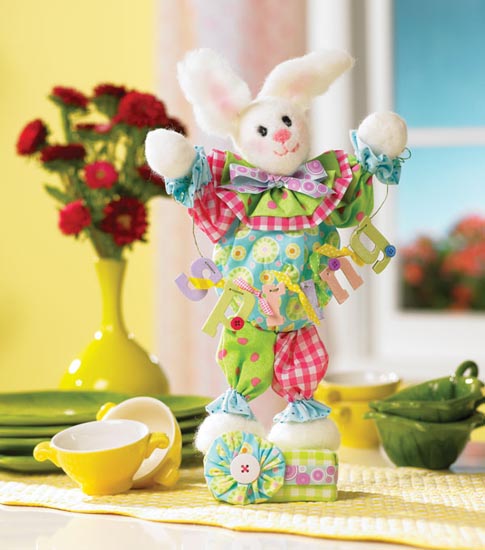
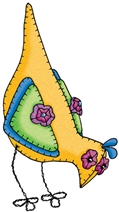
 Finally we get to see a friendly face around here! Debra has been making mostly feliines lately and we were getting concerned. Freda has been watching her tail feathers so much she has a stiff neck and can only walk sideways! Finally we get to see a friendly face around here! Debra has been making mostly feliines lately and we were getting concerned. Freda has been watching her tail feathers so much she has a stiff neck and can only walk sideways!
This new friend began as a 12" sheet of Makeit:Fun STYROFOAM Brand foam and the Spring Blossoms Wool Wisps Collection by National Nonwovens. Debra began by drawing a design lighty on the sheet. With her Clover pen needle tool she just needle felted away creating our very cheery spring friend! Adding some stitches, buttons and trims and in a very short time he was singing spring!
Obviously he hasn't looked out the window at the four foot high snowbanks yet! He still thinks he is in New Mexico, has a bit of an attitude as he was on the PBS show Creative Living with Sheryl Borden. Another Prima Donna, he and Freda will have to sort that out, ah should be a fun weekend! Follow the Fowl!
Monday, March 05 2012
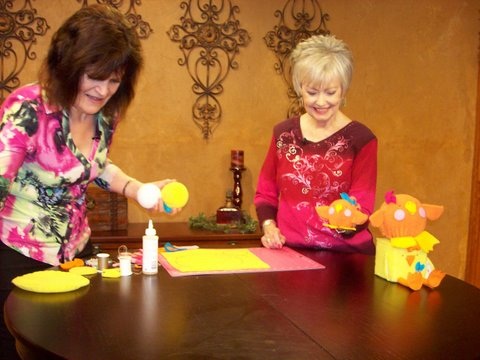
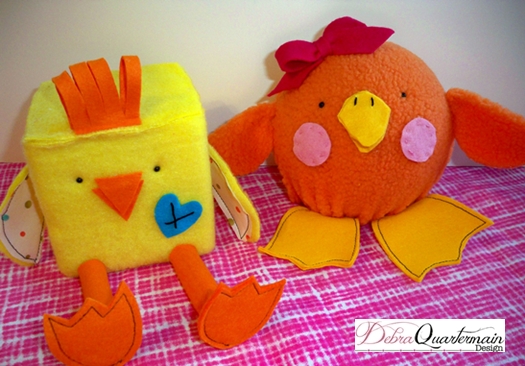
It is the first Monday of the month, time for the Designer Blog Hop Crafts Connection! Forty talented designers strut their stuff and offer some surprises as you hop along! We are celebrating interNational Craft Month! With Easter just a few weeks away I am featuring the tutorial for the cute chick/duck I demoed for a segment of Creative Living with Sheryl Borden.
Sheryl is holding the baby duck in the photo that I demoed on the show. In yellow it becomes a cute chick!
Materials:
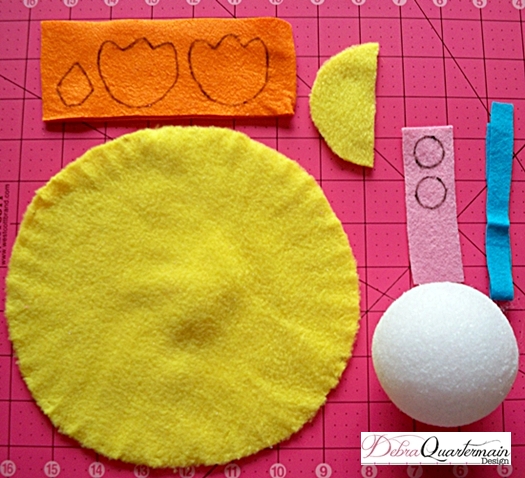
3", 6" balls, 4" cube of MakeitFun STYROFOAM ™ Brand Foam
1/6 yard yellow fleece
1/3 yard orange fleece
9" x 12" pieces of Canary (yellow), Papaya (orange) scraps of Fuchsia, Seashell Pink, Caribbean Surf ( teal) Xotic Felt by National Nonwovens
6" fabric scrap
1 chenille stem
1 skein black, pink embroidery floss
6 black, 12 colored head quilt pins
Aleene's Fabric Fusion™
Upholstery thread
Embroidery Needle
5", 8" Westcott Brand® Titanium Steel Scissors
(Ruler, measuring tape, pencil, circle templates for large duck 12", small 8")

- Making the Ducks: For both the 3" and 6" ducks construction is exactly the same. The pattern pieces included are for both sizes. Any variations will be indicated in instructions. For the 3" duck cut a 3" and 8" fleece circle. For the 6" duck cut two 3" and one 12" circles. Cut two of each cheeks, beaks and four of each foot from felt. Cut ½" by 9" strip of felt for bows.
.
- With upholstery thread anchor thread at edge of the large circle. Sew a small basting stitch around the complete circle.
- Pull stitches slightly. Place circle over ball pulling stitches tightly. Circle should stretch to close. (On larger duck if this does not happen, a small circle can be glued on bottom to finish the body.) Secure thread and cut.
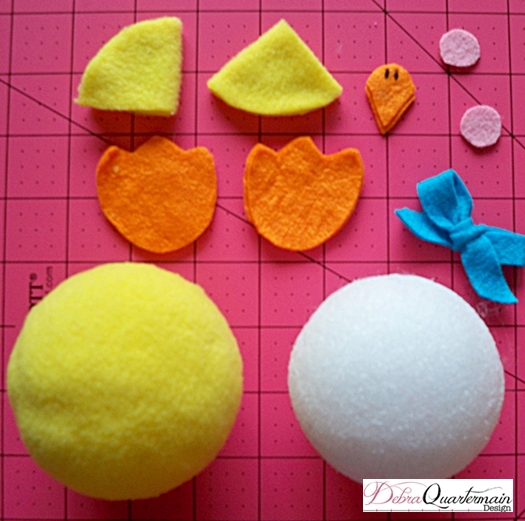
- For small duck cut 3" circle in half. Fold in half again wrong sides together and glue. For large duck fold each 3" circle in half wrong sides together and glue. Glue wings to sides of body as shown in photo.
- Glue beak pieces together angling top one slightly higher than lower beak. Make two small stitches at top of beak. (These stitching details are optional; they can also be recreated with a fabric marker.) Glue beaks to center of face slightly above wing line.
- Insert two black head pins as eyes. Adjust until you are pleased with location. Remove and dip in glue, reinsert pushing in to indent in face slightly.
- Sew around cheek circles with pink floss if desired or use fabric marker or add just as is. Glue to face of duck under eyes. Refer to photo for placement.
- Place feet together in pairs, reverse one pair. Glue together. Outline in black floss with a small stitch as an option. Glue feet to bottom of bird. Tie bow from felt strip, pin or glue to head.
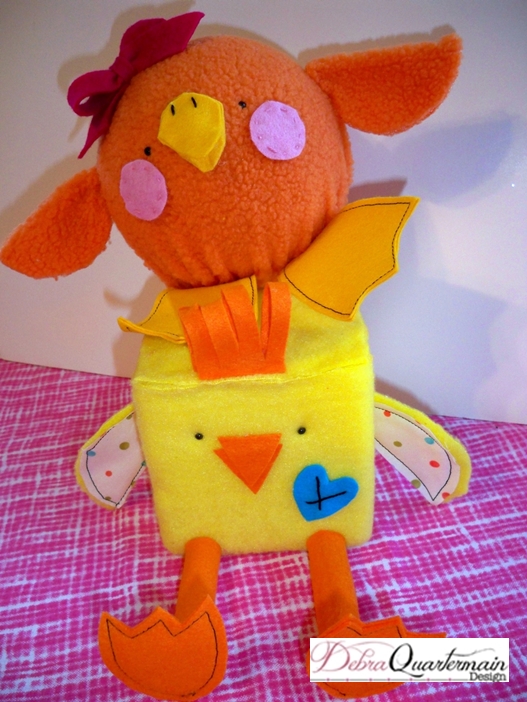
- Making the Chicken: Use the ruler to cut a 4" by 16" strip of fleece. Cut two 4" squares of fleece and one 3" circle. Cut one 1 ½" by 3" topknot piece, two beaks, two 3" by 3" strips and four feet from orange felt. Cut one 3" circle from fabric scrap. Cut one heart from teal.
- Begin at one edge of cube and glue long fleece strip. Wrap fleece piece around cube bringing it back to the edge to meet. Glue in place. Glue each 4" square on the opposite two remaining sides along edges. Press fleece seams together, add more glue if needed.
- Cut 3" fleece and fabric circles in half for wings. Glue or sew with black around edges. Pin or glue in place on either side of chicken. (Approximately at 3" mark.)
- Cut chenille stem in two 3" pieces. Roll an orange strip around each leg and glue. Place feet in pairs reversing one set. Glue or topstitch in black around edges. Glue to end of each leg. Glue to edge of body.
- Glue beak pieces together with top one slightly above lower beak. Glue to face. Insert two black head pin eyes. Add glue to ends and reinsert indenting slightly.
- Fold topknot in half, cut through from fold to 1/4 " from ends. Glue to top of head. Stitch through heart with black floss. (Optional or use fabric marker.) Glue heart to body.
Have fun hopping! Leave a comment here to enter your name for a fabulous pair of Westcott Brand® Extreme EdgeTitanium Steel Scissors! 
Monday, February 27 2012
I have had the pleasure of working with the Makeit: Fun STYROFOAM Brand Foam for several years now and the design possibilities are endless! For kids crafting with any kind of materials combined with the foam they can create magical creatures to fantastical structures to wild wall art! (and so can big kids too!)
For the Creative Living segments I taped in NM I showed how to make some funky birds from a foam ball shape and cube. A full video how to coming shortly!
By simply taking the shape and some fleece which has a bit of stretch and clings to the ball easily. You can create the cutest characters. Soooooo introducing Roberto Rooster and Daphne Duck! Creating the JOY! always!
Wednesday, February 08 2012
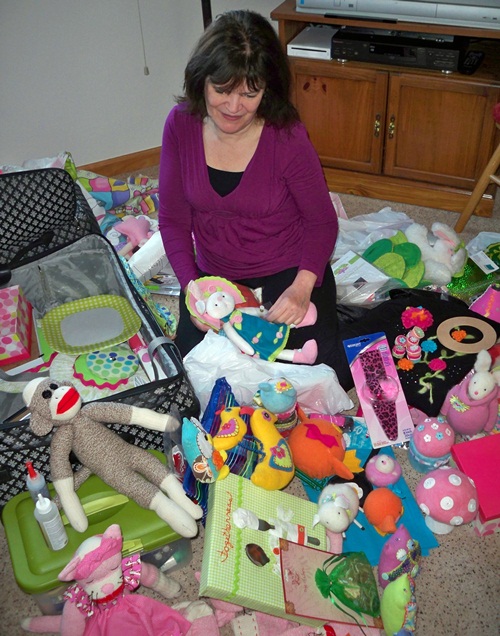
Early this morning I am off to tape segments of Creative Living with Sheryl Borden in Portales, New Mexico. This has been a whirlwind trip from CHA in Anaheim to flying to Albuquerque to prepare for show. Stepouts and instructions are ready. Outfit planned, no black and white so I chose a colorful dress to wear!
I am a little nervous and very excited to be showing techniques and designs featuring my sponsors, Westcott Brand, Makeitfun Crafts and National Nonwovens. I appreciate their support very much to be able to offer crafty and sewing inspiration! Projects and instructions coming soon!
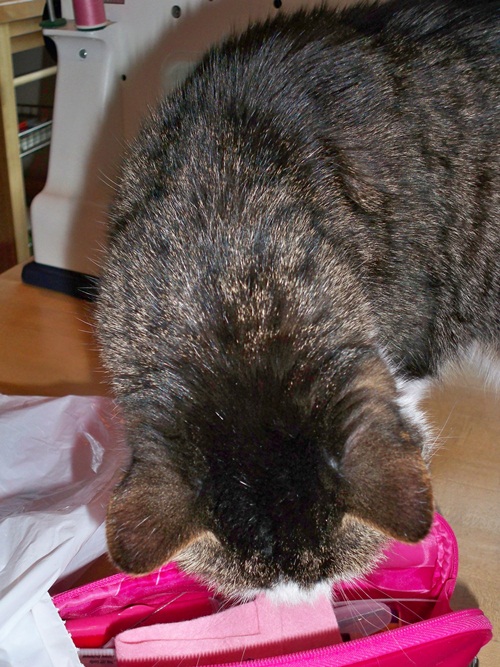
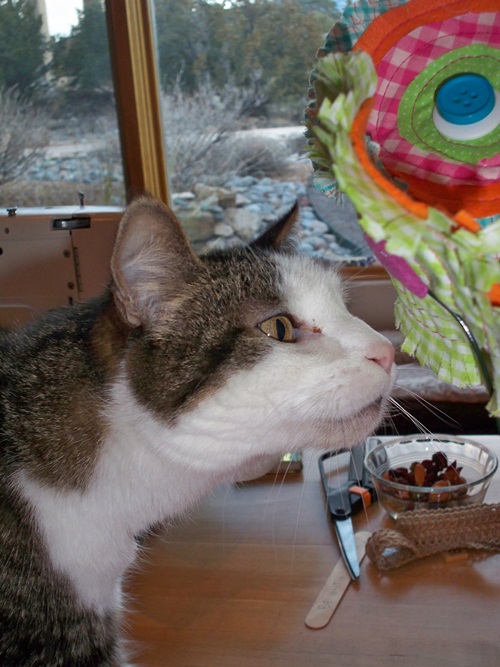
Meanwhile here is a sneak peak behind my scenes, my exploding suitcase and my entourage and assistant Fox the cat, I couldn't have prepared without his invaluable assistance!
Thursday, December 29 2011
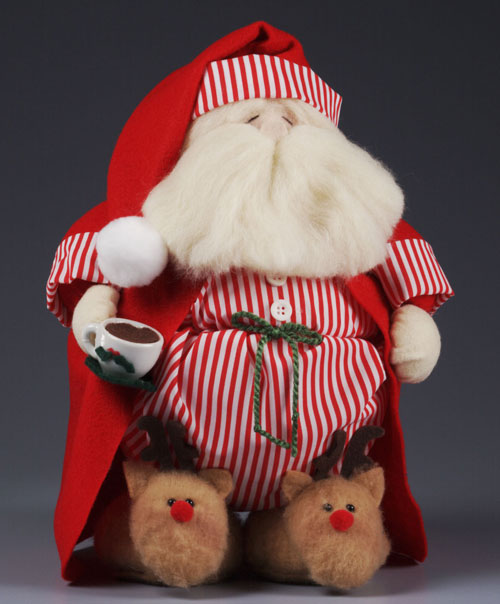
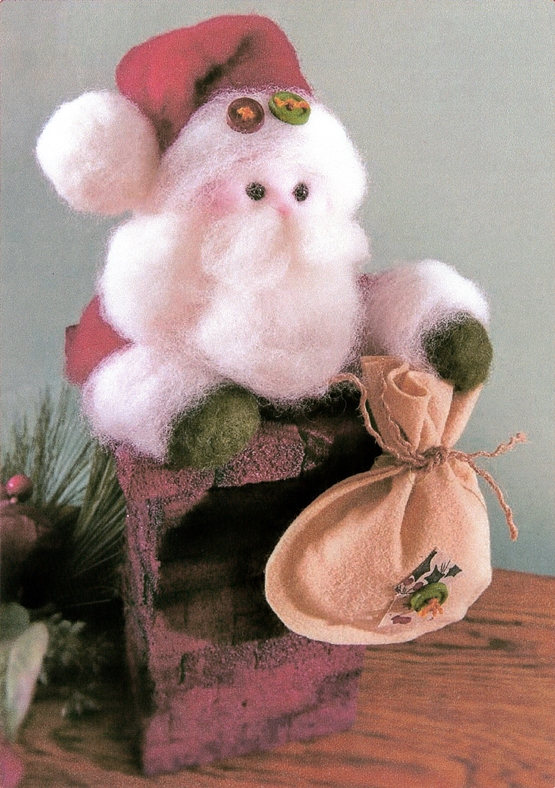
One of my favorite designs I created for Styrocrafts was Santa the day after his big night. (full instructions available on site along with many more great projects) Sleepy in his robe and reindeer slippers, I often wondered if he was making any New Year Resolutions or just simply enjoying the last few days of the year reflecting, remembering and enjoying!
Resolutions, intentions, reflection on the year past. All I know is living with love and integrity, celebrating and sharing joy is the path I travel. Our hearts are bumped and bruised along the way but oh so much more fills them with deep love and strength. My darling daughters hold my heart, my love's reflection, a special one has danced into my heart and life is good! 2012 holds much creative adventure ahead!
To all of you who take the time to visit, to read and comment, a sincere thank you from the bottom of my heart. May 2012 be filled with what brings you joy always! 
Thursday, November 10 2011
In the latest issue of Crafts 'n Things I designed a cute Santa for Dow using my favorite technique of needle felting wool to STYROFOAM Brand Foam. He is coming up from the chimney made of Make it Fun TM Project Bricks. They are really fun to work with to make realistic walls. The small rectangular bricks cut easily and can be painted.
(photo courtesy of Crafts n' Things)
The bricks are stacked alternating the joints just as in a real wall although these 'bricks' are much easier to cut! Full instructions to mkae this cute Santa are in the issue. Happy creating!
Monday, October 31 2011
Happy Boo Day! To decorated spaces and haunted places, to dressing up and make believe, cute wee witches and little ghosts may you have a fun fillled delicious treat of a day! Debra
Wednesday, October 26 2011
It is the season for spooktacular creations! STYROFOAM brand foam lends itself to all kinds of delightfully scary projects, quick and easy to make. This group of whimsical characters by Plaid Crafts are ideal for decking the ghoulish halls! A ball and a cone shape, so many combinations!
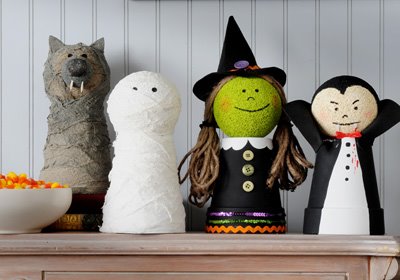
(photo courtesy of Plaid Crafts)
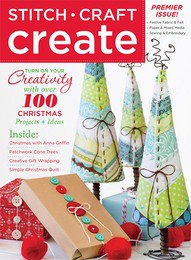
A new magazine has just been released. I haven't seen it yet but the snippets I have seen are gorgeous projects combining sewing and crafting, two of my top favorites! Look for inspiration in Stitch Craft Create. The creative life is an inspired one! Be inspired today and follow the JOY of Creativity! Debra
Friday, September 16 2011
 Hi Peeps! It is our favorite day Fowl Friday, with Fran & Freda! So much is happening our heads are spinning! Freda almost fainted yesterday with Kate's news of spending time with the hunky Curtis Stone in the Holland College kitchen yesterday. She has been watching his shows since she was very young (as she is only 19 now!) It has been quite the summer for her first cooking for the Royals and now Curtis! Hi Peeps! It is our favorite day Fowl Friday, with Fran & Freda! So much is happening our heads are spinning! Freda almost fainted yesterday with Kate's news of spending time with the hunky Curtis Stone in the Holland College kitchen yesterday. She has been watching his shows since she was very young (as she is only 19 now!) It has been quite the summer for her first cooking for the Royals and now Curtis!
We are also so excited about the Blog County Fair happening, Debra is stitching up something for that tomorrow. There are Blue Ribbons and everything, we have been polishing up our eggs ready to enter! It is hosted by the very talented Laura Bray and Vicki O'Dell!
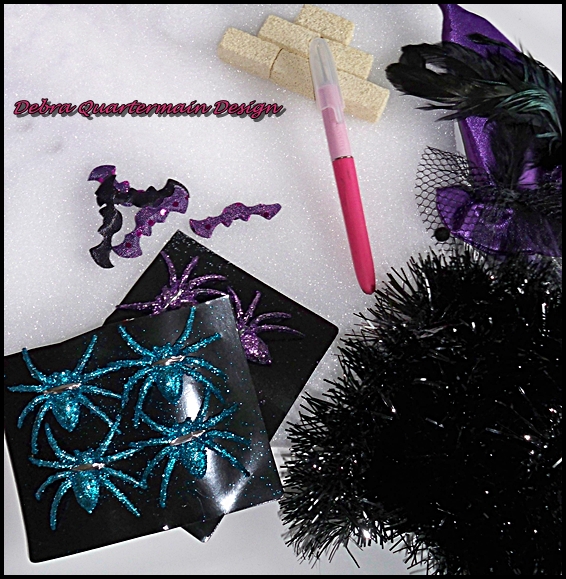
It is also that spooky time of year soon. Debra took a trip to the local dollar store for some fun stuff. Came home all a glitter literally. Got out her new favorite cutting tools and mat by Westcott , a STYROFOAM Brand foam sheet and Project Blocks from Floracraft's MakeitFun brand.
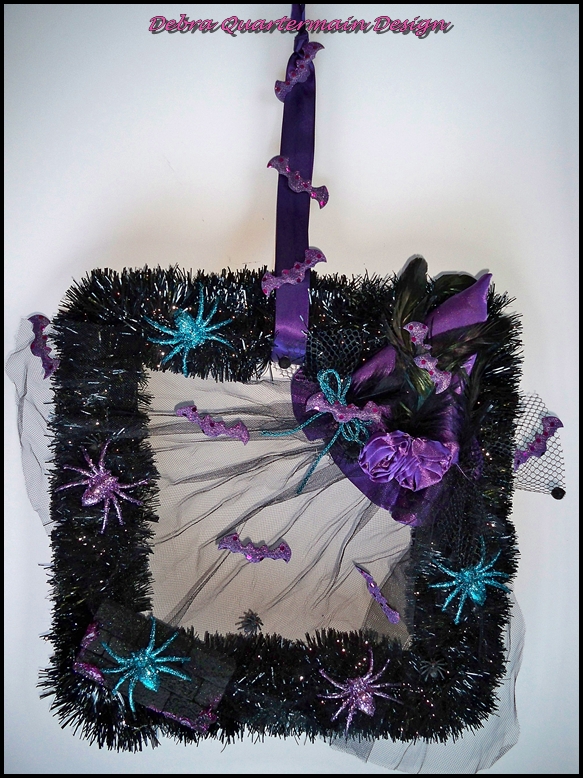
Glitzy Witchy Wreath! only an hour to make! See how easy peasy below! Happy Haunting Fran & the faint Freda!!!
Supplies: Make it Fun 12" Foam Sheet & Project Blocks
Westcott Brand Craft Knife, Scissors & Mat
Black glittery boa, glittered spiders, hat with netting, purple & teal ribbon
Black acrylic paint, Brush, Ruler & Glue
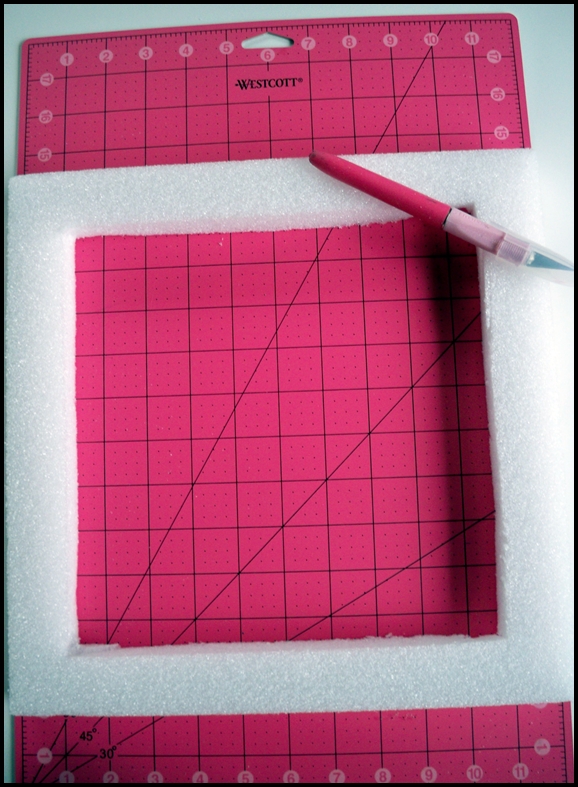
Mark 1 1/4" in around the four sides of sheet. Use the ruler width to do this, makes it very fast and easy. Repeat on both sides. Cut along lines with craft knife. Turn over and finish cutting on reverse side. Carefully push out center to use for another project.
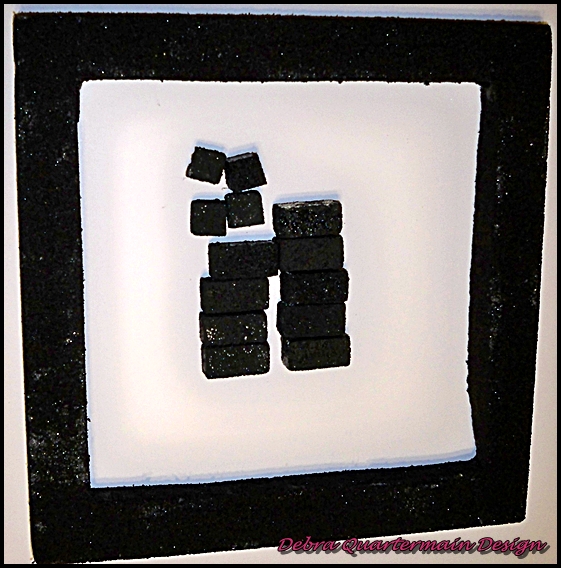
Cut two project blocks in half. Paint blocks and wreath with black paint. Let dry.
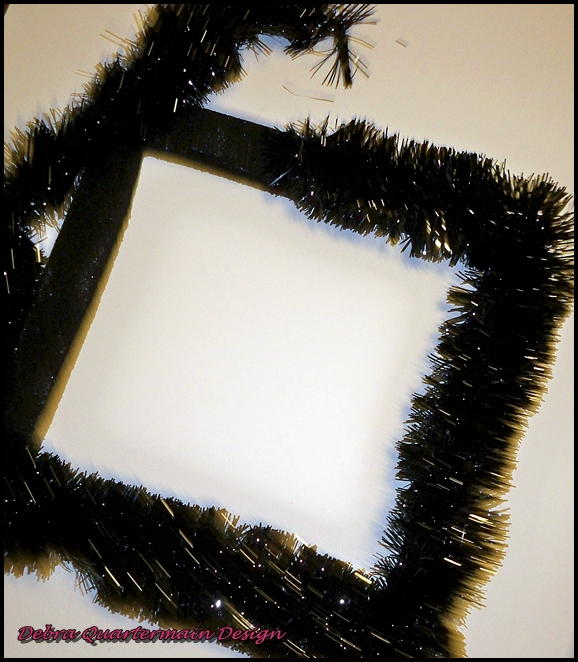
Start gluing garland trim along front of wreath. Glue along outside edges as well. One garland is enough for both.
Then it is time for the fun! Glue project bricks together to make a mini wall alternating brick pieces. Glue in lower left corner. Glue hat in upper right corner. Stretch netting over entire wreath. Glue on bats, spiders what ever you like. Tie a 24" loop through top and hang! Boo to You!
Wednesday, August 31 2011
One of my favorite new blogs to read is Crafts 'n Coffee featuring all kinds of great crafting with STYROFOAM brand foam. Even though I have designed with the foam for ten years I am constantly amazed by the variety of beautiful projects, especially the home decor ones.
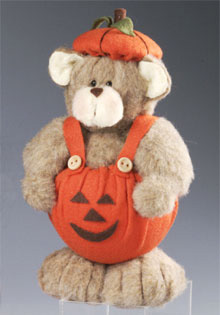
Yesterday's post features a variety of ten autumn projects to create. One of my designs a whimsical teddy in a pumpkin suit is featured. I love the stacked Halloween blocks and the numerous ways to create a pumpkin. With Thanksgiving in early October here in Canada I will be decking out the place with fall decor in another week!
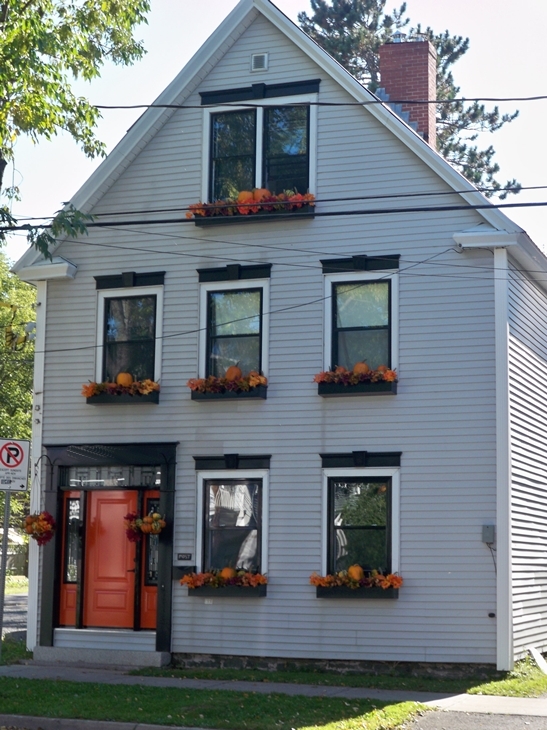
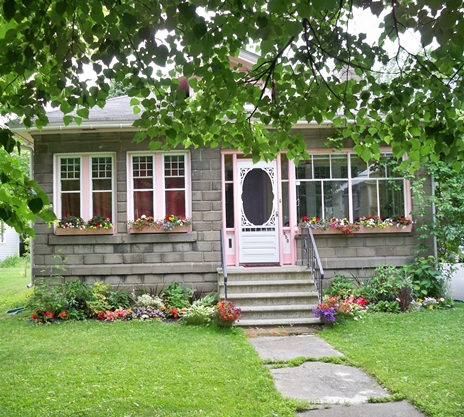
Even though fall is coming and the air is a little cooler at night, it is still so pretty walking the downtown neighborhood on these sunny afternoons. There is the cutest stone house down the street with pink trim. It looks like a fairy tale cottage and each time I pass by it makes me smile. I wonder who lives there, the ivy along the side cascades from the roof adding to its yesteryear charm.
Tuesday, December 21 2010
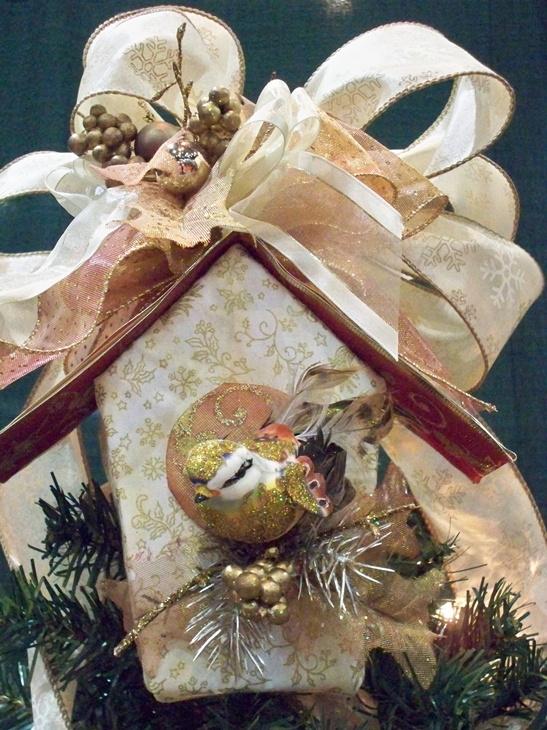
Creating decorations for my new place has been fun. I enjoy working with fabric and felt and trims. Using STYROFOAM brand foam shapes I created some larger lightweight ornaments for the tree. When there is not alot of time and you are going for a wow factor larger ornaments are the ideal solution. Since I have a bird theme in my place I wanted to make bird houses for my tree. I cut foam blocks angling the sides. Covered the block with fabric, created a roof with ribbon covered cardstock and then embellished with trims, ribbons and floral accents.
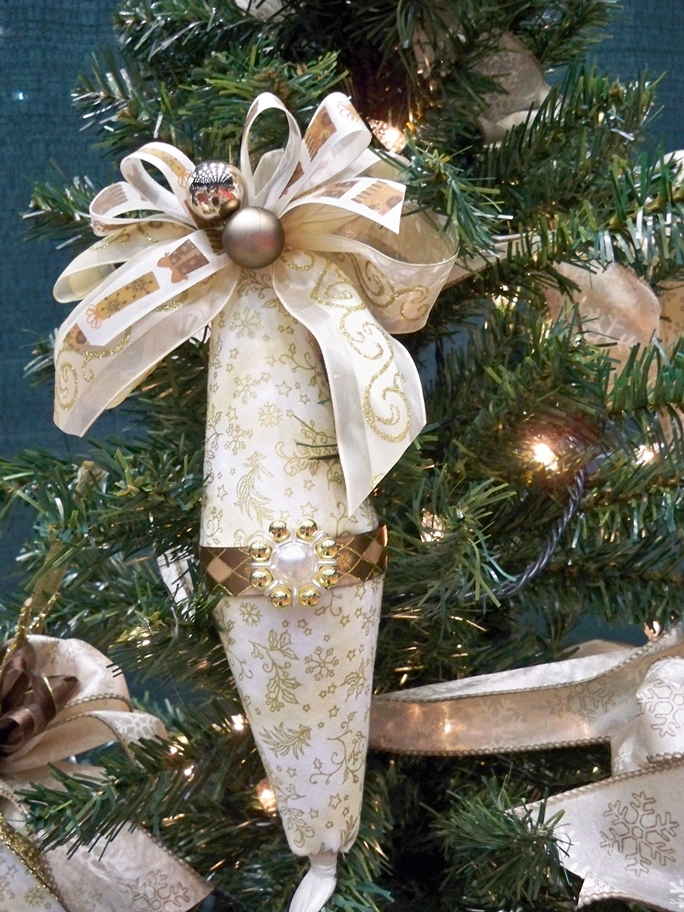
The second ornament I designed was using two small foam cones glued together. Again I covered the shape with fabric adding ribbon, tassels, buttons and trims. They give an elegant look to the eight foot tree in the entrance way.
Today the place smells like lemon and chocolate, my daughter and I baked all day listening to Christmas carols. Tonight we are watching "Elf" which is one of her favorites, she can recite every line which adds to the fun!
May this Holiday season find you enjoying many wonderful moments! Follow the Joy! Debra, CEO!
Thursday, August 12 2010
Not trying to rush the season but I want to share some Holiday fun projects!
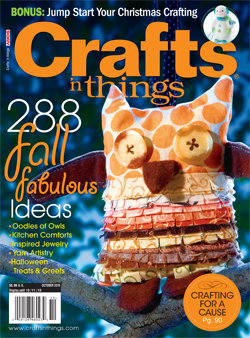
The fall issue of Crafts 'n Things is out! My wee button snowman made the cover in his own special wee way above the S for Snowman. He is needle felted over STYROFOAM brand foam, one of my favorite techniques. Also in the same issue is my version of the popular sock monkey using foam shapes as well. It is fun to work in reverse with the foam, I start with the shape and build around it instead of with sewing, sew the shape and then fill it.

|