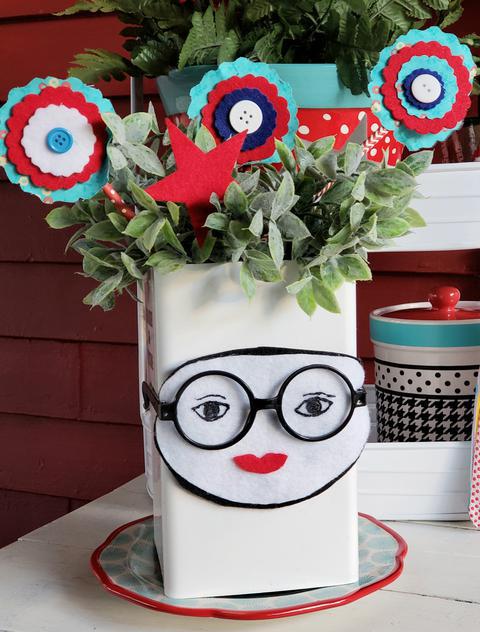
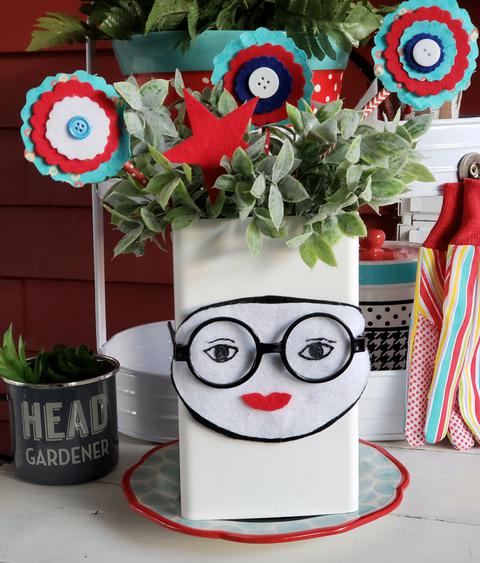
Have you noticed all the trendy face and head planter pots? They are so fun and whimsical! I used a recycled container and here is my How to Make Face Planter Pot. I give the pot a Patriotic flair with the addition of DIY felt flowers for the Team Creative Crafts Patriotic Edition. I like to use home decor items from around the house and add details to make them special for different holidays.
The base for this fun planter were a couple of plastic cubes I glued together. They came with our new arbor assembly and held little bits. I kept them to make something and a whimsical planter was perfect. I used Kunin Felt for the face as it is weather resistant. Now I have a fun addition for my new potting bench.
Let's get started!
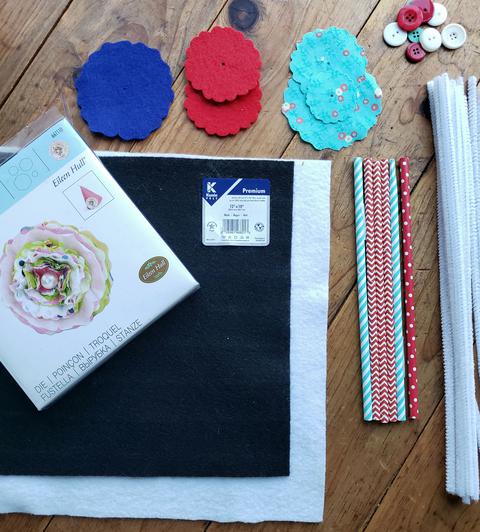
You will need a container, the face is about 6" but can be adjusted in size. My conta8ner is the same width of 6".
9" x 12" craft cuts of Kunin Felt: White, Black, Red, Royal Blue
Fabric Scraps
White chenille stems
Straws
Buttons
Flower Die, I used Eileen Hull's Flowe Die with Sizzix (or cut free hand flower shapes)
Fabric Glue
Dimentional paint in black
Scissors, ruler, marker, chalk, pencil, 6" and 2" circle templates
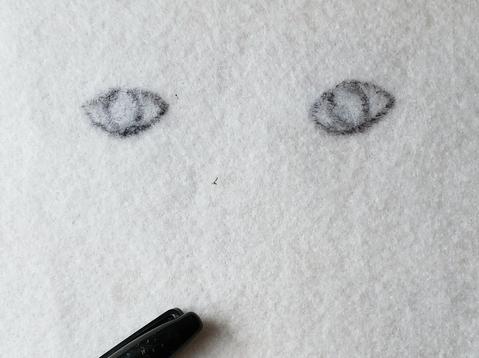
Step 1:
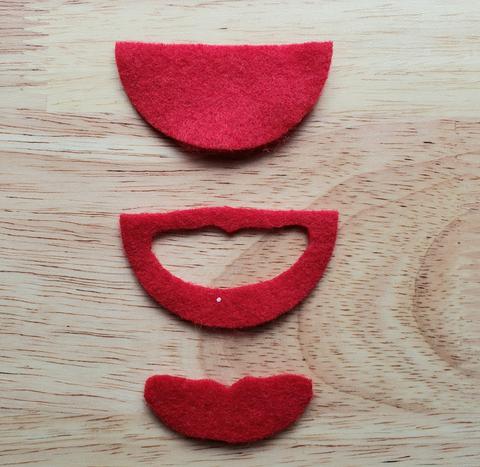
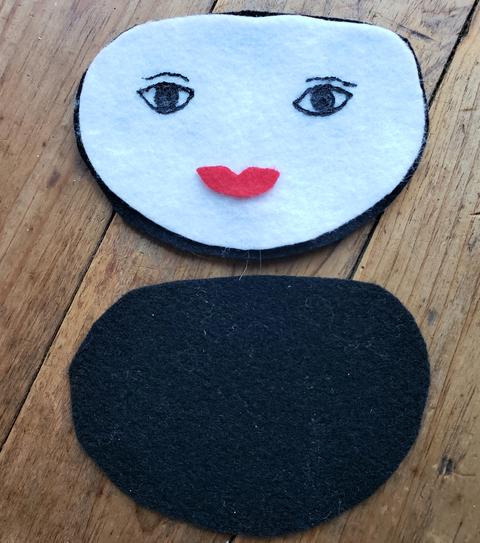
Cut a 6" circle from white and black felt. Trim in to oval shape. Cut the black one slightly larger than the white. Draw eyes with pencil on white. Paint and let dry. Cut 2" circle in half. Fold one half and curt a small lip shape. Glue to face. Glue white face over black back. Glue to front of container. I had these cute Harry Potter glasses that were a perfect fit!
Step 2:
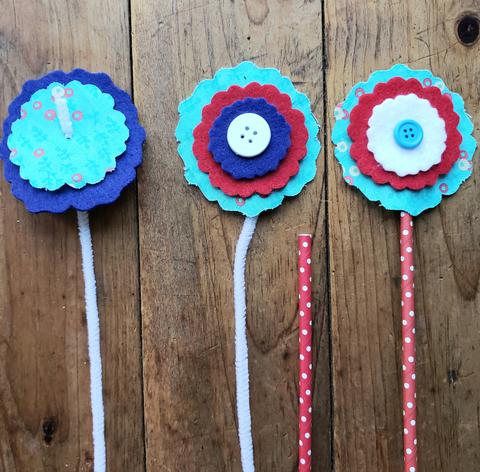
Die Cut felt flower shapes from fabric scraps and red, white, blue felt. Layer flower shapes making as many as you want.
Step 3:
insert chenille stem through each flower stack, bend end. Glue button over chenille stem at center. Insert straw. Bend end over slightly. Cut off excess. Repeat for each flower.
Place greenery in your Face planter and add felt flowers. Add some felt stars if want and as many flowers as your container needs.
Want to be inspired by more creative Patriotic crafts, just click the link in the sidebar!
Thank you for enjoying my How to Make Face Planter Pot, such a fast and easy DIY!
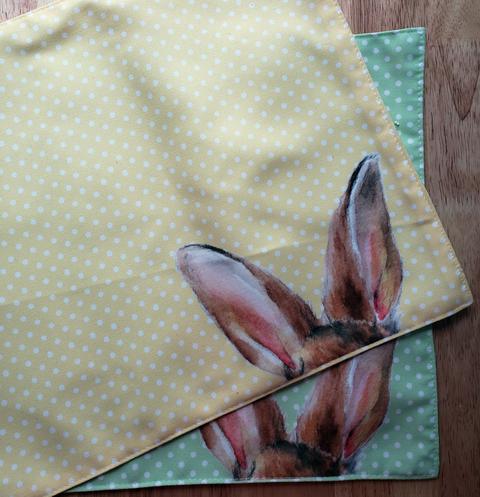
Welcome to the Creative Crafts Collaborative, Edition 9, Recycled Craft Projects! Recycling and upcycling projectshas been a big focus for me this past year. I have been creating new spring pillows from placemats, tablecloths and tea towels. These Upcycled Bunny Placemat Pillows were the perfect addition to my spring decor!
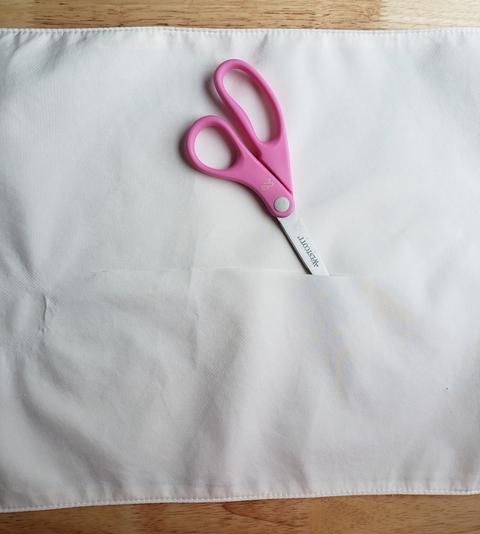
Look for placemats with a lining and are a close woven fabric like a cotton polyester blend. Recycling placemats gives a tailored pillow and is completely a no sew project.
I admit to having a thing for polka dots and bunnies!
This iis a quick and easy project! Carefully cut a slit through placemat back lining only.
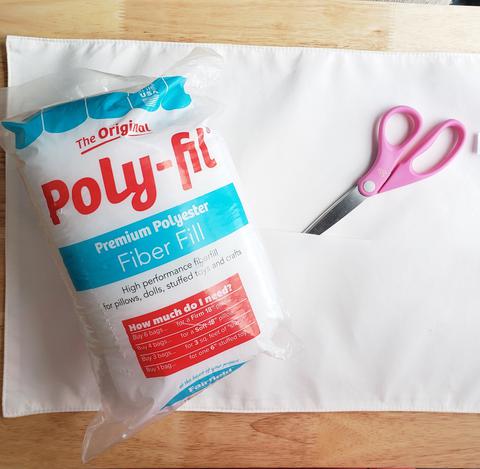
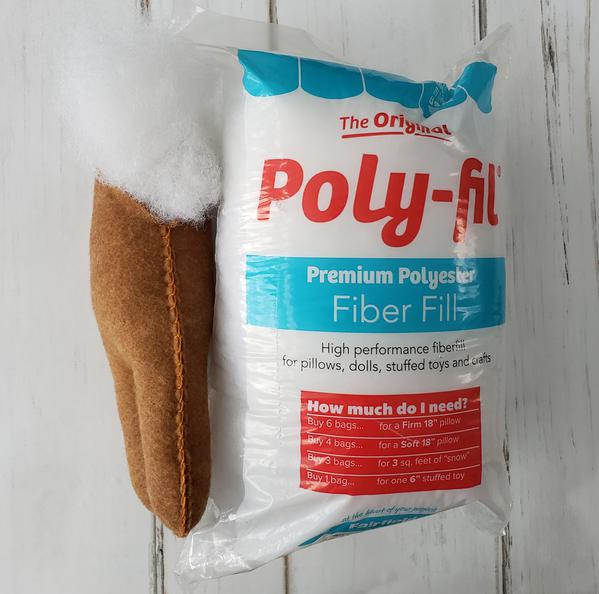
Stuff with a quality fiber fill. I use Fairfield World's Poly-fil. Push poly-fil into the four corners first.
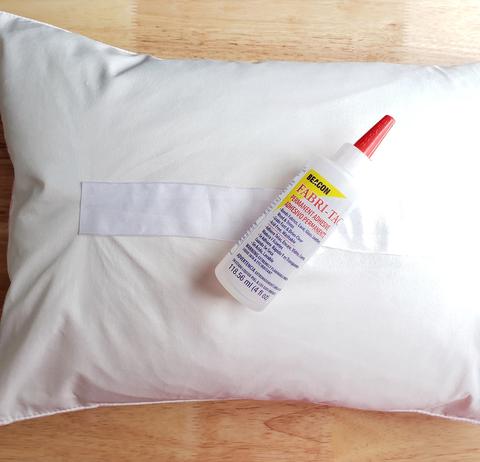
Take a piece of 2" wide ribbon an inch longer than slit. Match back of pillow. Use Fabri-tac to glue ribbon over opening. Ta da! You now have an Upcycled Placemat Pillow! How easy was that ?! Often placemats are marked down or check thrift stores to create more custom pillows.
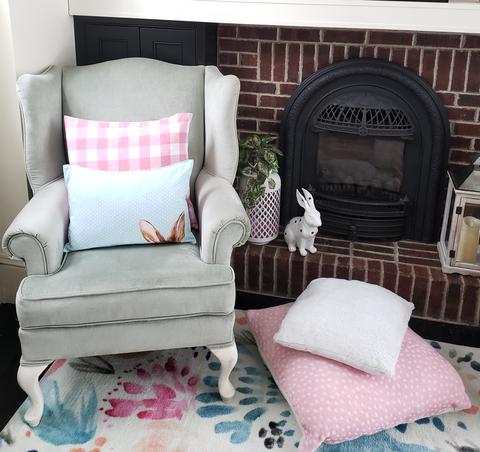
The bunny pillows were in four pretty colors so I could use them in different rooms.
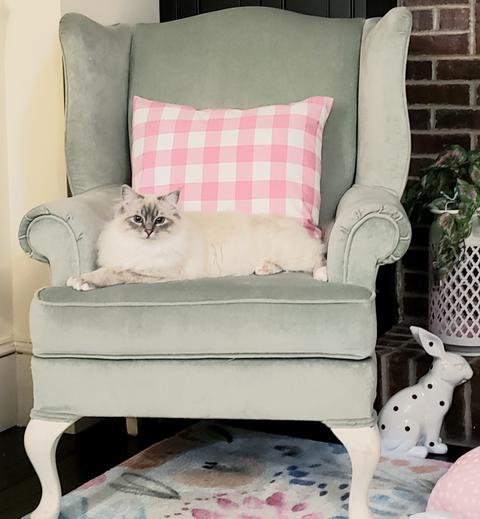
The pink check pillows were another upcycled project from a tablecloth used at a baby shower. I made them in a simple envelope style and used pillow forms from Fairfield World. The cute cat is our Birman @reignofrory on IG! He loves this chair.
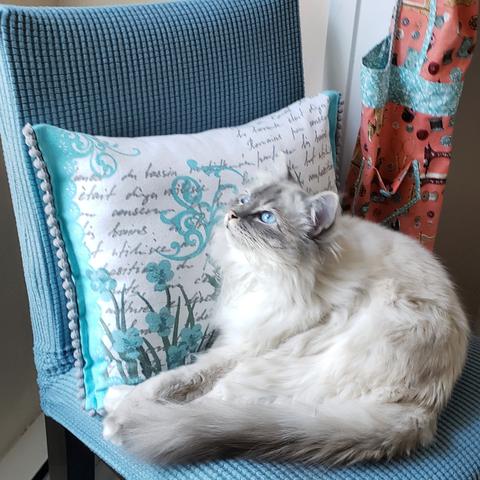
Rory also loves this stool in the laundry room which has another recycled or upcycled pillow created from the cutest tea towel! Kitchen linens come in so many pretty and fun prints and patterns, a whole world of thrifty creative and trendy home decor projects! When you want to change them just gently pull off ribbon and unstuff!
The Creative Crafts Collaborative, Edition 9 Recycled Creative Crafts has an awesome Give Away sponsored by Fairfield World, a $100 Gift Card from JoAnn and 10 pounds of Poly-fil!
The Give Away is happening over on IG. Find me @debraquartermain.
Thank you for taking the time to visit my blog and hope you are inspired! Debra
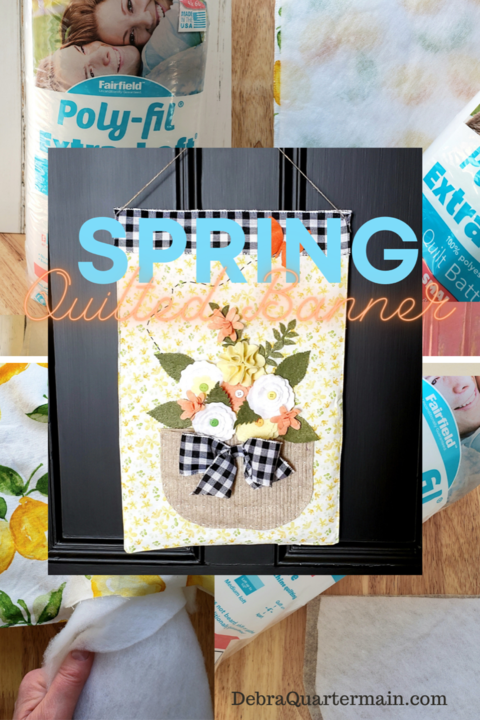
Hello Spring! Here on the East Coast of Canada we still have lots of snow but I am dreaming of my garden and of course fresh garden decor. In partnership with Fairfield World I am delighted to bring you my Spring Quilted Banner. This only requires some hand sewing as I like to create easy DIY projects and love incorporating placemats and napkins into decor items.
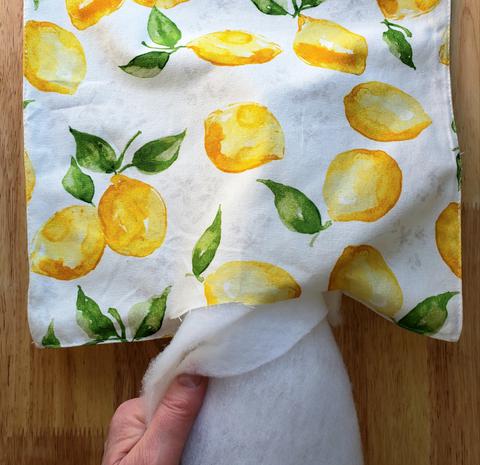
For this project I used a placemat which has a pretty design on both sides so the banner looks good coming and going. Placemats are 12" wide which is the width of most banner rods so that is very convenient.
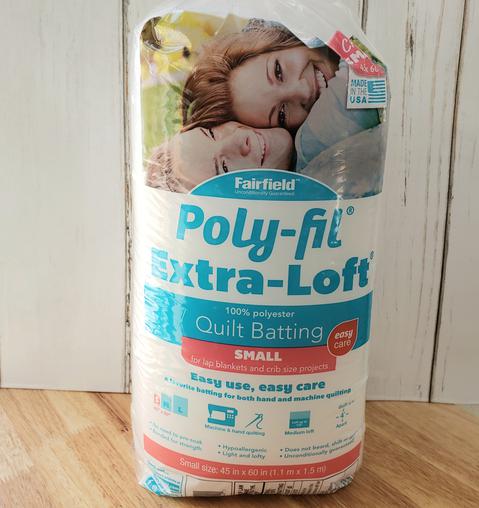
The Quilt Batt, Fairfield World's Poly-fil Extra Loft Polyester Quilt Batt, Crib Size.
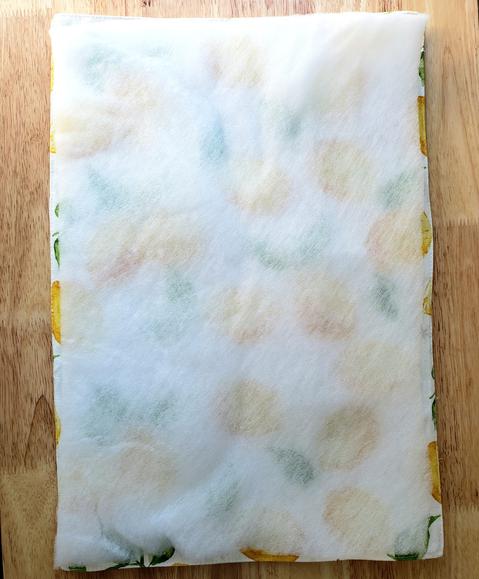
Using placemat as a guide cut a piece of quilt batt slightly smaller than placemat. Decide on what side of placemat is front of banner. Cut 4" slit lengthwise 1" down from one edge of wrong side.
Step 2:
Fold quilt batt slightly and insert into placemat. Push into corners and press flat.
Step 3:
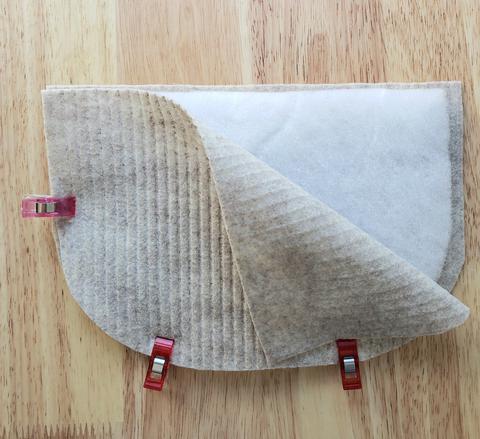
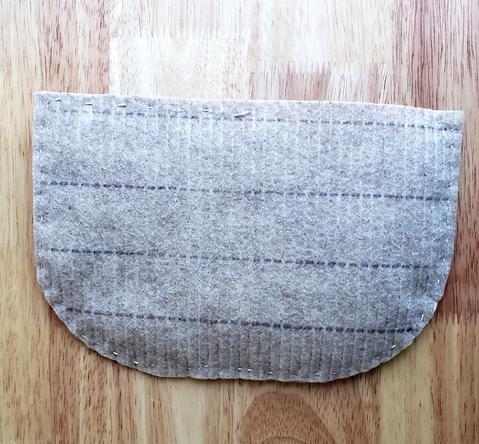
Cut the sandstone piece of felt in half. Fold one piece in half again and cut a curved edge. Unfold and use as pattern to cut a second basket back. Use one piece as a guide to cut quilt batt slightly smaller than basket size.
Step 4:
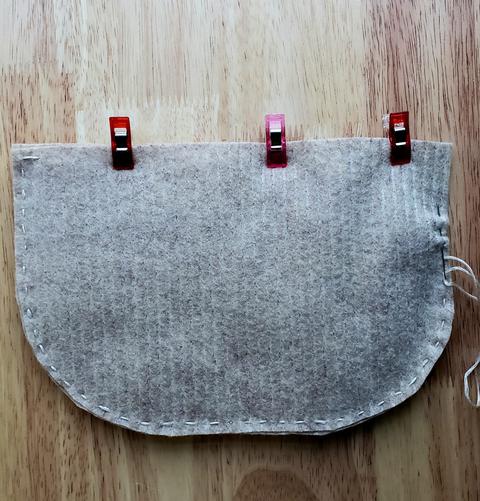
Draw equal lines across back of one basket piece. Make a sandwich of the three basket pieces with quilt batt in center.
Step 5:
Straight stitch around edges of basket. Stitch across marked lines on back.
Step 6:
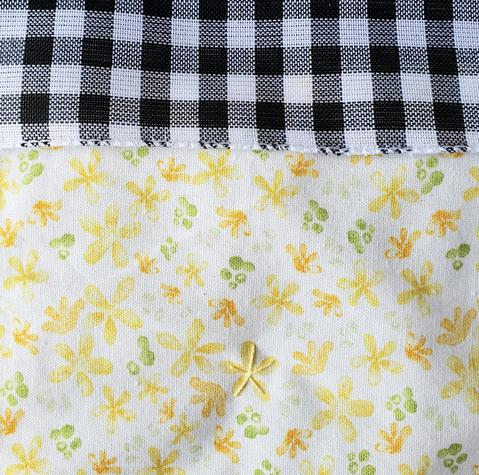
Glue piece of ribbon along top edge of placemat back covering opening. Glue piece of ribbon along front matching the back. Leave ends open. Add extra quilted details like straight stitched flowers.
Step 7:
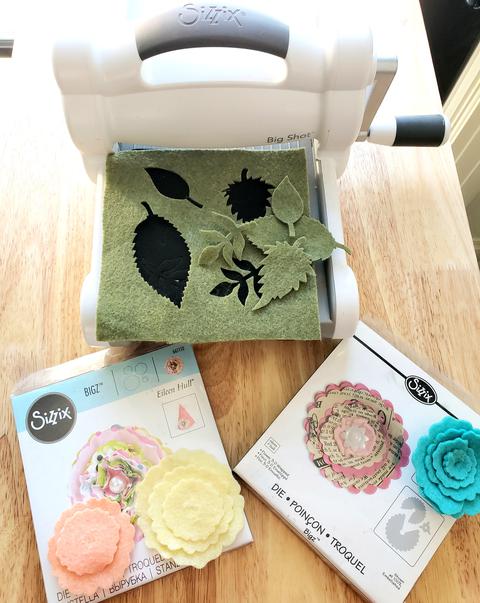
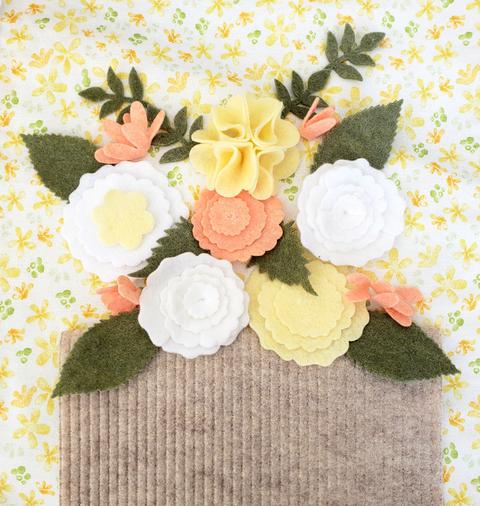
Die Cut flowers and leaves.
Step 8:
Create flowers. You can use my layout as a guide but create the layout, flowers and colors of your choice. Layout flowers out and take photo.
Step 9:
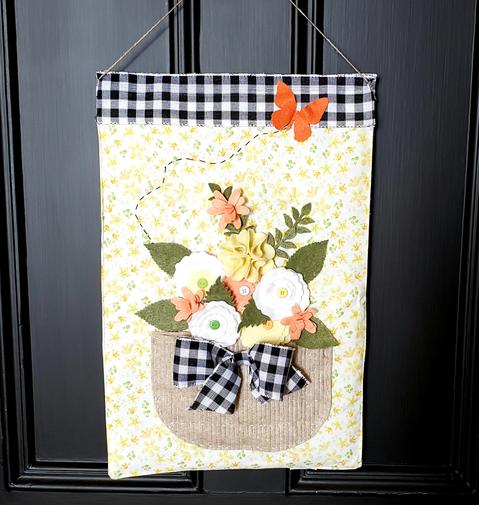
Glue basket and flowers to banner. I added stitching and a felt butterfly. Tie a bow from remaining ribbon and glue to basket. Tie jute on one end of dowel. Insert through top of banner. Tie jute on opposite end of dowel. Glue and trim jute ends.
This banner is ready for my garden! The quilt batt will keep it hanging nicely when there is wind and allow it to dry quickly. Check out more of the inspiring projects by Fairfield World, follow them on FB and Instagram!
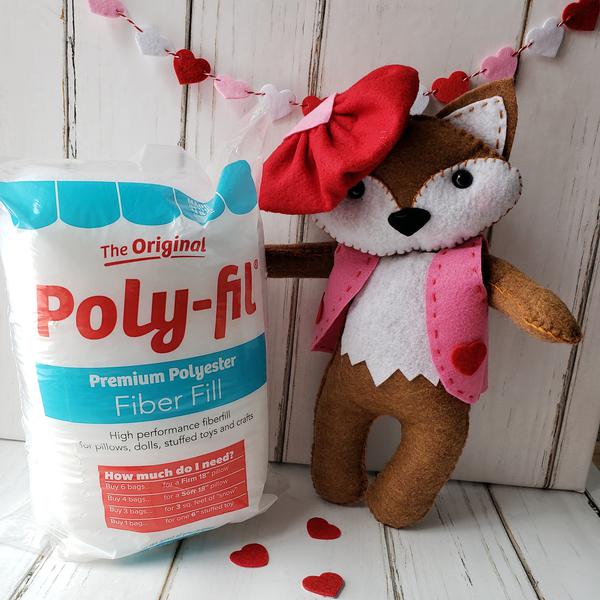
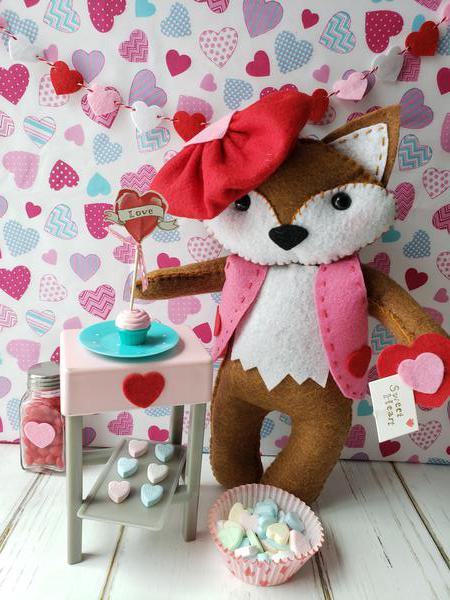
Say Hello to Valentino, a dapper felt fox stuffie I designed in partnership with Fairfield World. I love their Poly-fil for making stuffies. I was inspired to create Valentino by my trip to Paris a few years ago. Want to make this charmer for yourself complete with beret and vest. Come along with me, ma cherie!
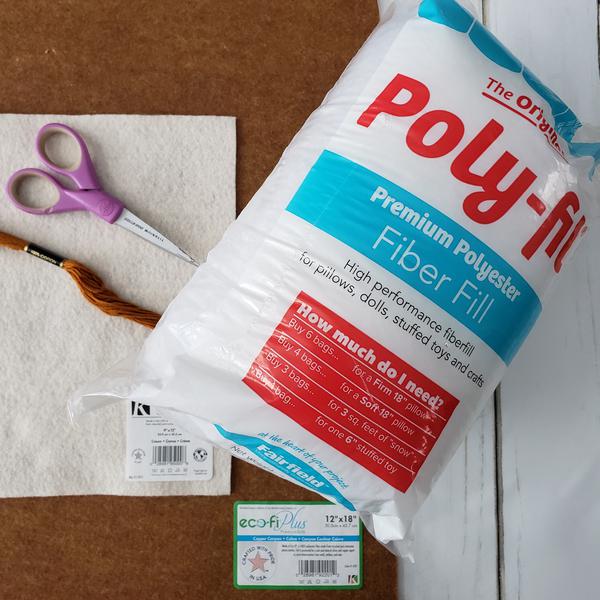
Pins, clips, printer and paper, pencil, scissors, embroidery needle
Step 1
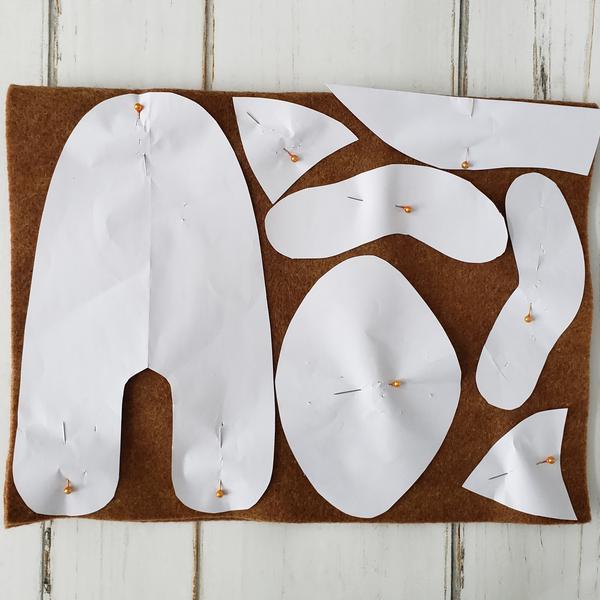
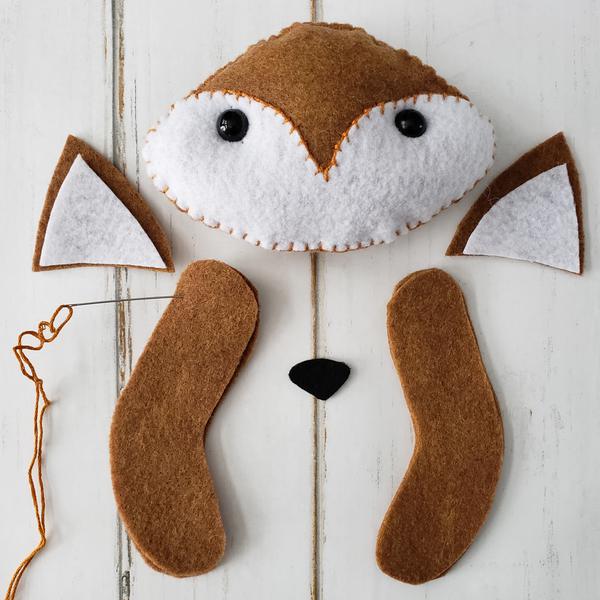
Printable Patterns: Fox, Fox 2, Vest. Print out patterns. Cut out fox pieces and lay out on folded piece of Copper Canyon as shown. Cut out around each piece.
Step 2
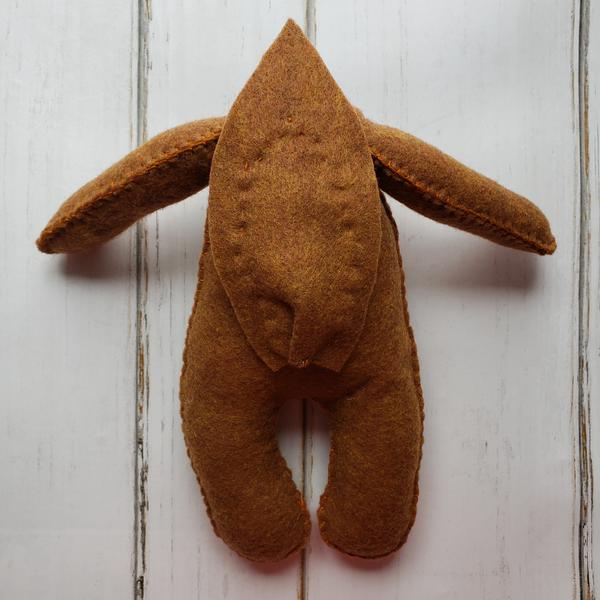
Place body pieces together. Pin. Blanket stitch (tutorial) or machine stitch if preferred. Begin at top and stitch around coming up to within 2" of closing. Stuff body. Finish blanket stitching closed.
Step 3
Cut out white pattern pieces for Face, body, ears and tail. Blanket stitch white face front to one head piece. Stitch or insert eyes at this point. Stitch head pieces together, leave opening and stuff. Close opening. Stitch arm pairs and stuff. Stitch ear white fronts in place with a straight stitch.
Step 4
Stitch ears to top back of head on either side. Glue on nose. Straight stitch tail white piece in place. Place arms on either side of body and stitch back and forth through body pulling slightly. This will make them moveable. Glue or stitch on white body front.
Step 5
Stitch or glue tail to back of body as shown. Stitch head at top of body overlapping slightly.
Step 6
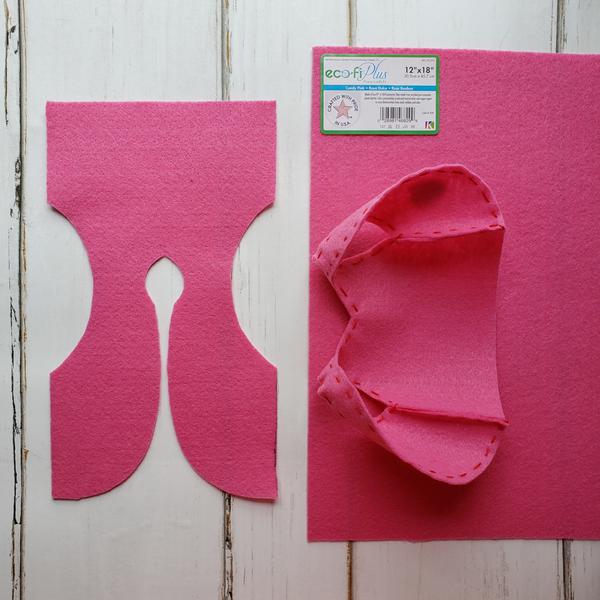
On the fold cut out a vest piece from Candy Pink. Striaght stitch side seams together and add decorative straight stitch around all edges. I used red. In my craft stash I had sticky back little felt hearts and added those to the vest. You can also cut them out of felt scraps.
Step 7
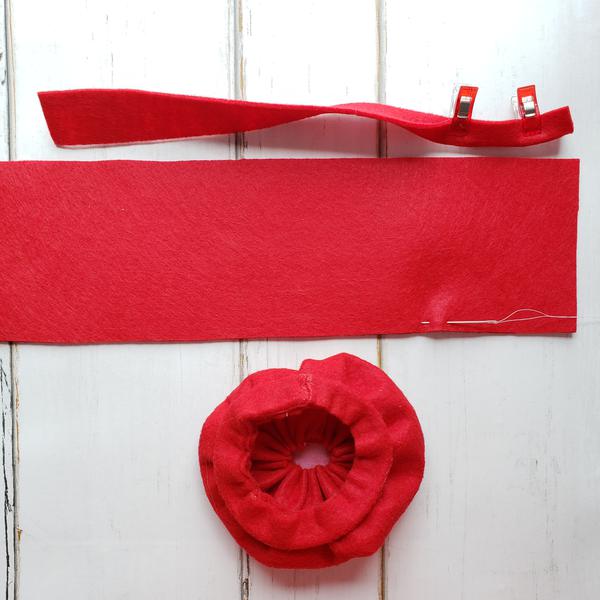
To make the beret, cut a strip 1" by 12" from red felt. Cut another strip 3" by 18". Fold the narrow strip in half and glue. Sew a gathering stitch along both edges of wider strip. Pull stitches tight on one edge. Secure. On the other side pull stitches to fit band. Glue to band. Clips or pins will help to hold in place. Glue seam together. Cut a small heart or use a button to cover hole in top of beret. Glue in place.
Now the fun part, dress Valentino or Valentina if you prefer. This would be a fun surprise for a special valentine. Not reccommended for a young child under three but suitable for older children. The premium felt is a heavier weight. Valentino the felt fox stands about 12" in height and I used some fun 18" doll accessories in his Valentine display. My grandlittle girls will love him. I will probably be making a couple more at least! Hand stitching is very relaxing. You can just be comfortable, have a good light and stitch away.
Thank you for visiting my Valentino the Felt Fox. Felt is an easy medium to work with and Fairfield World has the best poly-fil stuffing. Check out the other Fairfield January stuffie designs by talented designer/blogger friends!
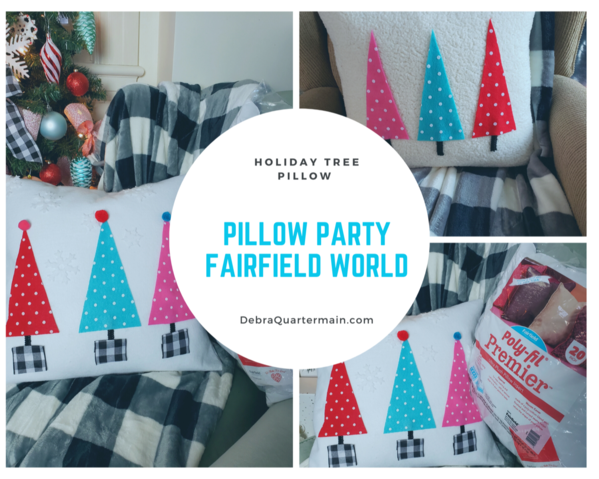
Welcome to the Fairfield World Pillow Party 2020! A team of talented bloggers have joined the fun to create pillows for the party sponsored by Fairfield World! There is a great give away of six 18" pillow forms so you can have your very own pillow party!
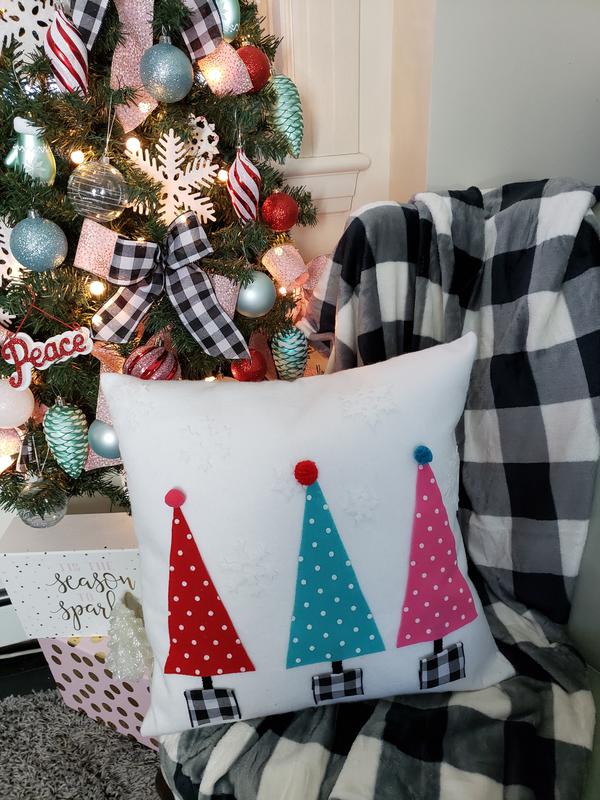
My contribution to the party is a super easy and simple tree pillow. Let's get this party started!
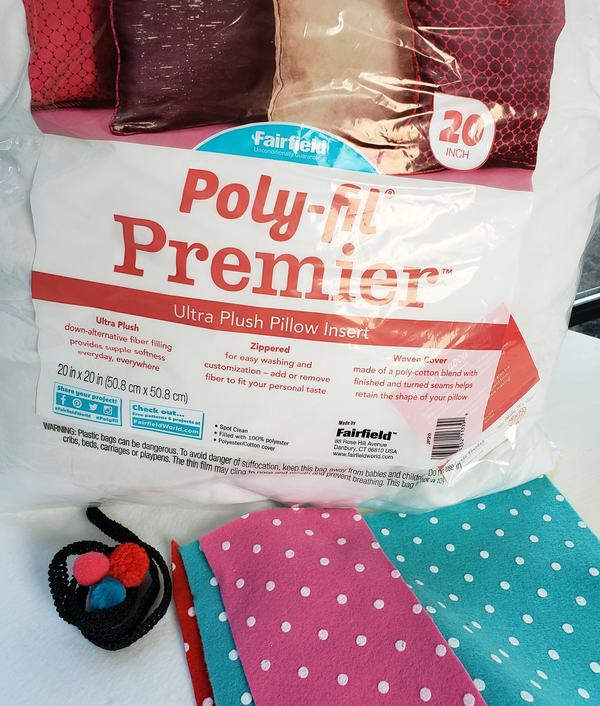
Scissors, measuring ruler, embroidery needle, sewing machine and matching thread (optional, can also be glued with Fabri-tac), paper and pencil.
STEP ONE: Cut a 20" by 44" of white for the easy envelope pillow. Simply fold felt strip overlapping an extra 5" in the center. Sew down each edge and turn pillow. Smooth and flatten. (By making the pillow cover an inch smaller, you will have a nice plump pillow.)
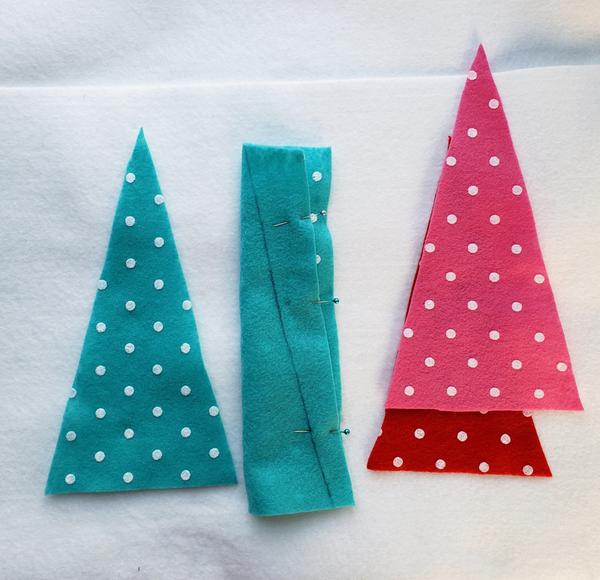
STEP TWO: To make the trees. Simply fold a piece of felt a third over. Measure 2.5" over at bottom as shown. Draw a diagonal line to top. Cut. Repeat for all three trees. (If you cannot find the polka dot felt simply paint white dots or use small white buttons if you prefer.)
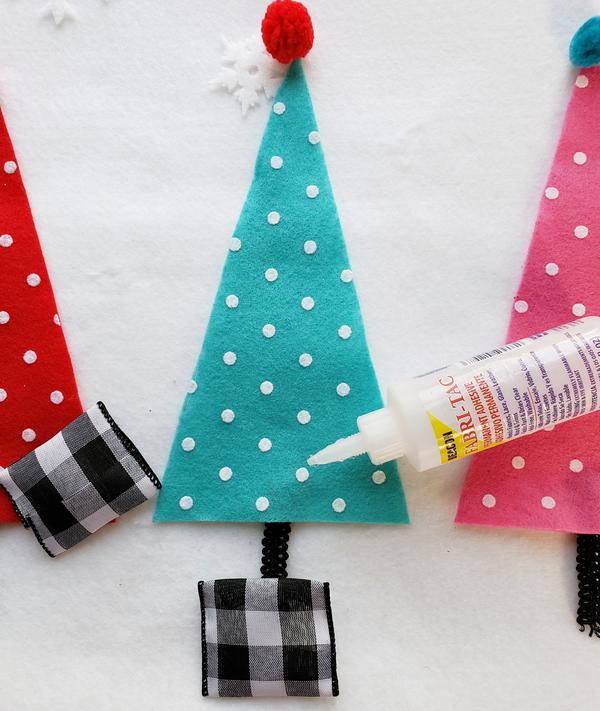
STEP THREE: Cut three 3" pieces of ribbon for trunks and 4" pieces of buffalo plaid ribbon for the pots. Fold under edges.
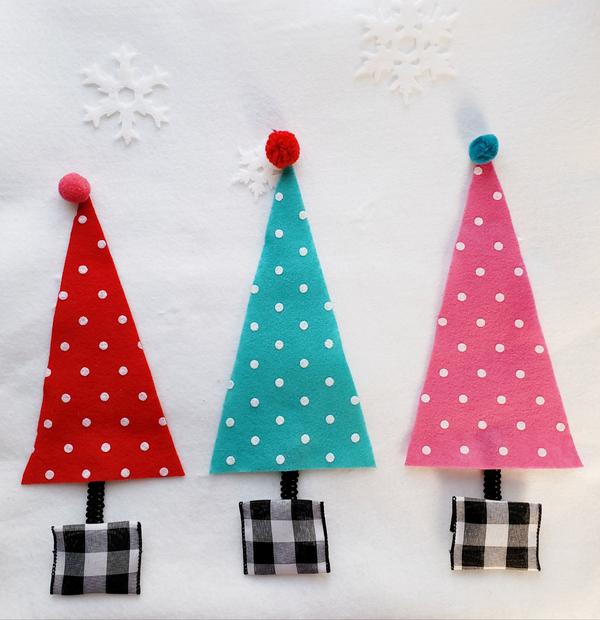
STEP FOUR: Place trees, trunks and posts in place. Begin with middle tree and glue in place. Add trunk before gluing bottom edge of tree. Glue pots in place. Glue pom poms to top of tree or omit pom poms if you have a kitten. One of my trees is missing a pom pom.
Place the pillow form iinside and enjoy!
From today until January 31st you can get 20% off any Fairfield Products. Just use my special coupon code pillowpartyDQ. Hope you have enjoyed my contribution to the Fairfield World Pillow Party with my Holiday Tree Pillow! Check out all the pillows and enter by the RaffleCopter in the sidebar!
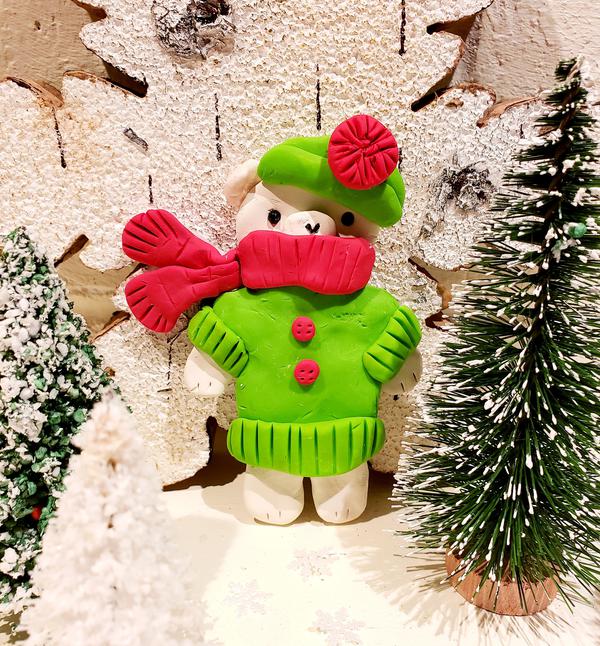
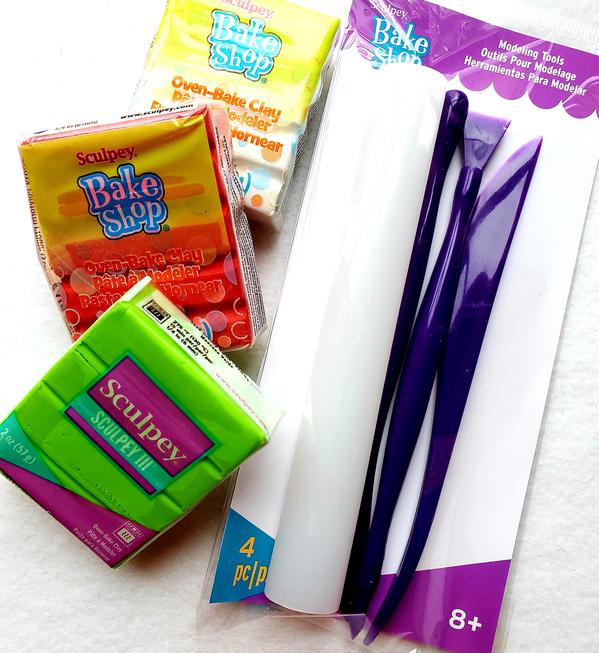
It is time for Creative Crafts-Christmas Edition! We are sharing Holiday creativity with Sculpey! A package arrived with three festive colours of Bake Clay and tools. My favourite thing to make always is stuffies. Say Hello to Holly Bear, my mini clay stuffie!
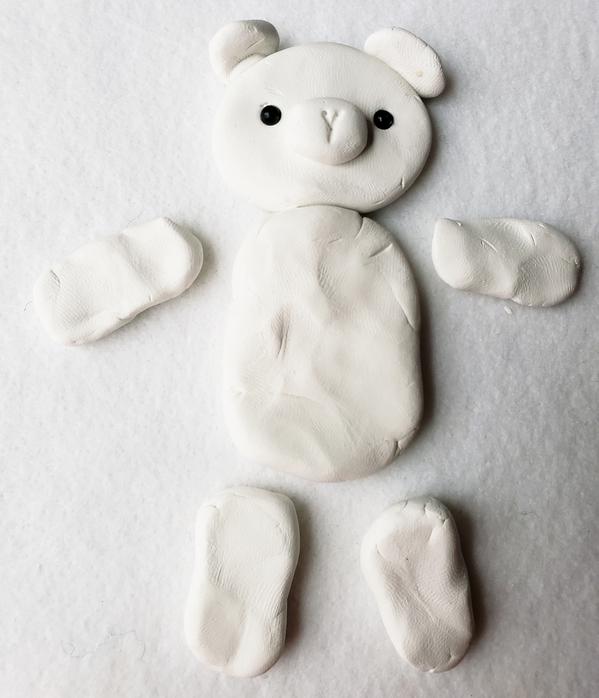
I have used clay a few times and love the feel as you roll it a little in the heat of your hands to warm up. The blocks are divided in sections. This enables you to break off equal pieces which a perfect for shaping same size legs, arms and ears. I basically created shapes as shown. The eyes are a very hard plastic. Baking temp is low so they were safe to use. Place pieces all together, wet slightly if needed when pressing together.
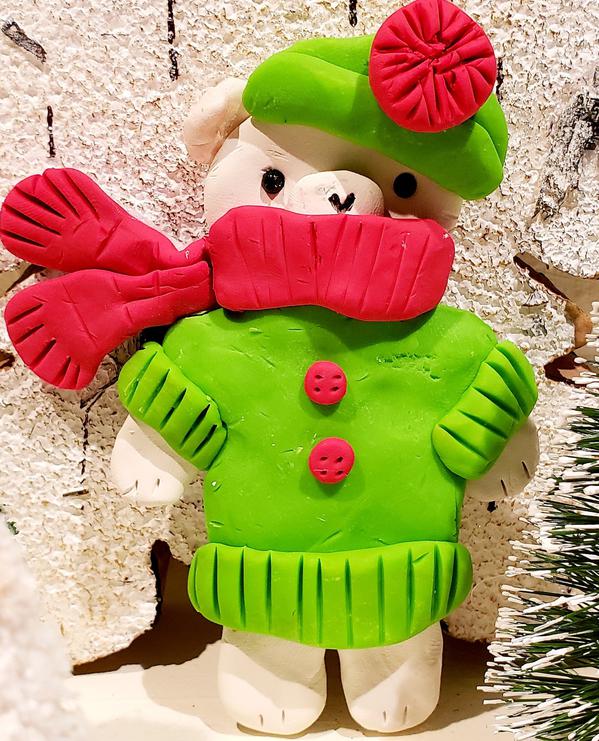
From the green roll a couple sections together to make a sweater. Trim to fit. Smaller pieces for cuffs. Roll out shapes from red to make hat and scarf, buttons. Use end of tool to make score marks and details.
Click on the link in the sidebar to be inspired with more Creative Holiday Crafts and GiveAway!
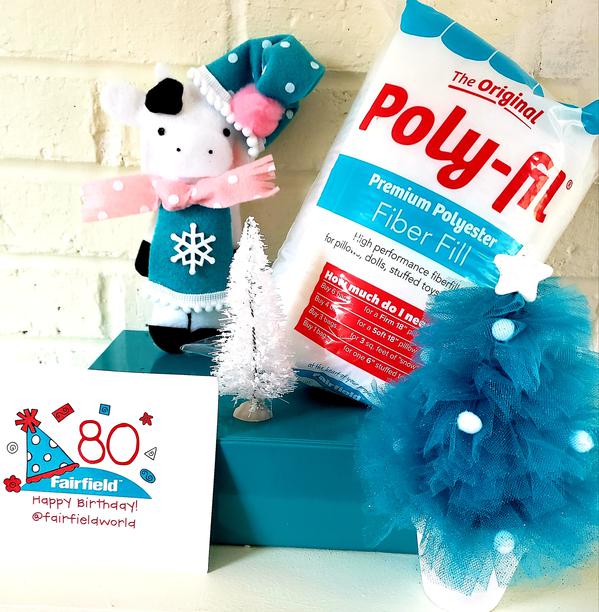
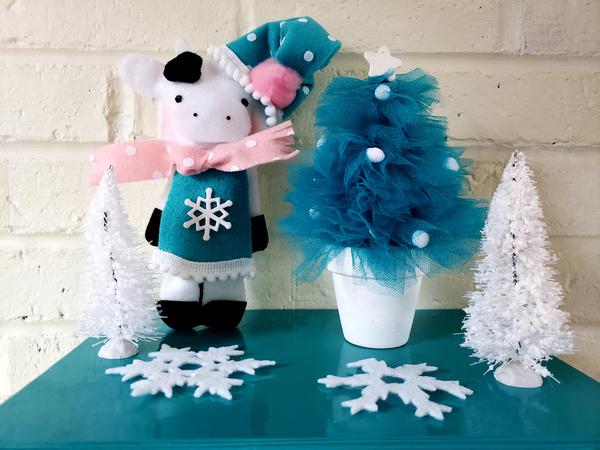
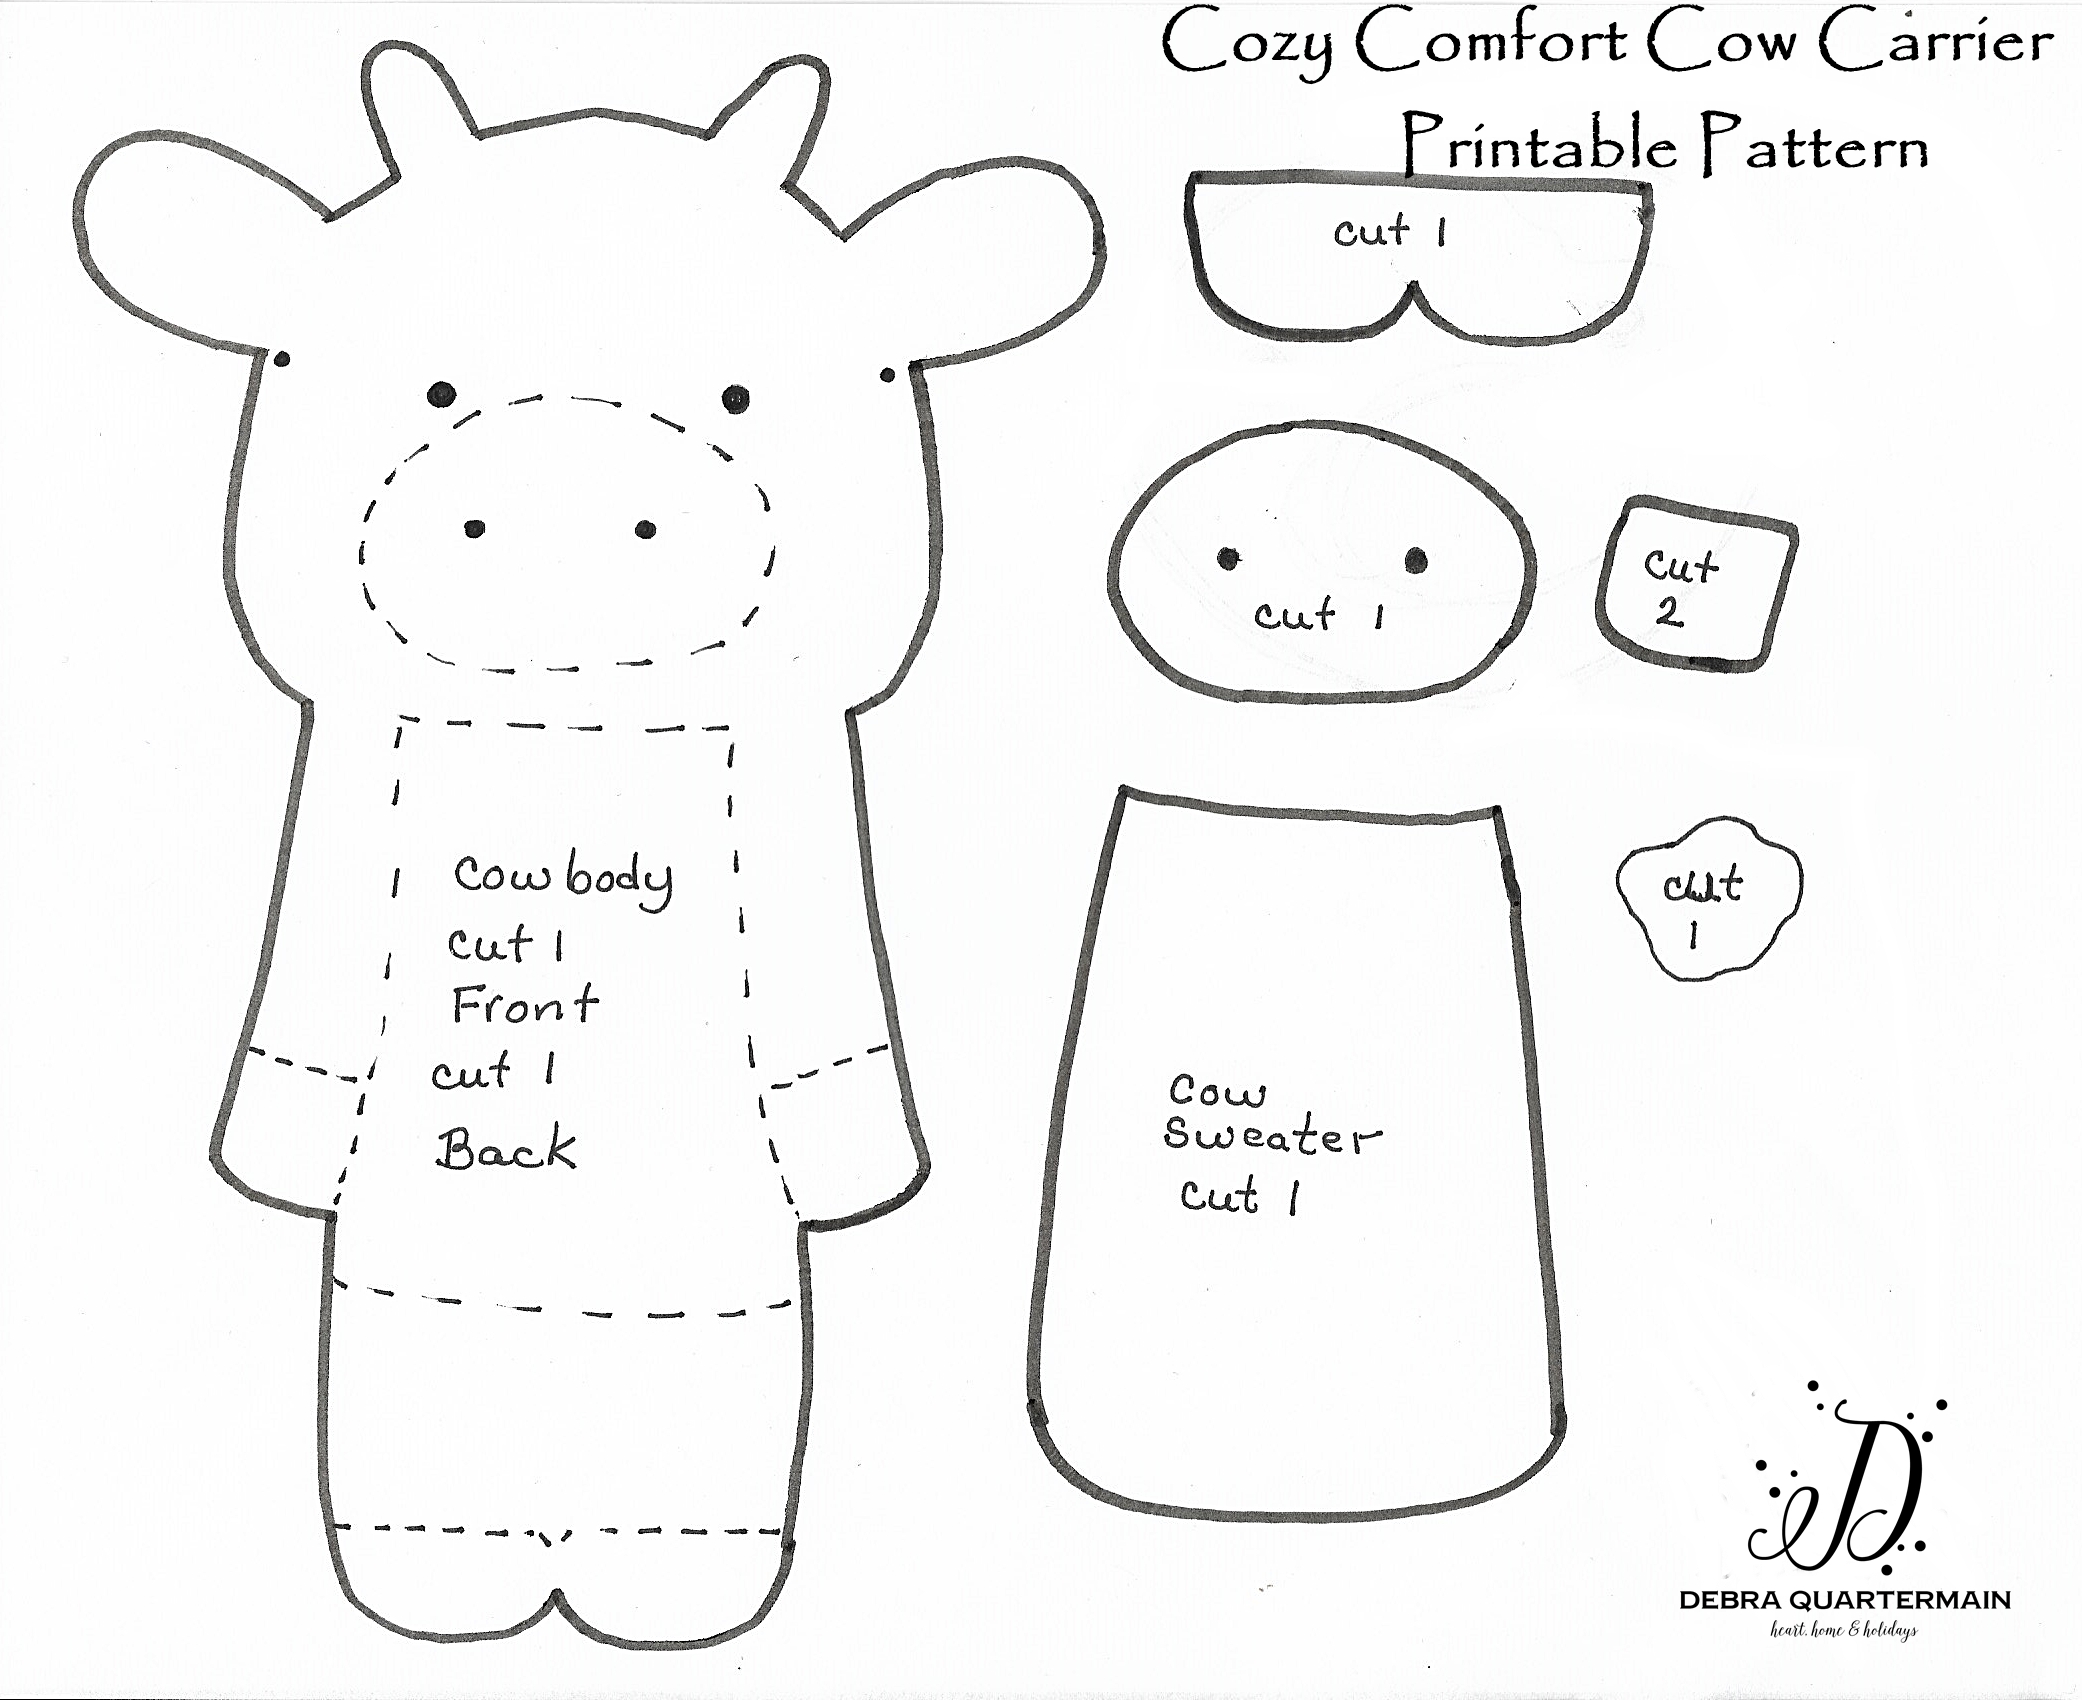
Happy 80th Birthday Fairfield World! I am very excited to be one of eighty talented designers celebrating Fairfield World's birthday. "Fairfield is a third generation, family-owned and operated American business dedicated to providing high quality and innovative fiber-processed products to the DIY, home decor and industrial trades." I designed this cute No Sew Felt Cow Stuffie named Snowflake using their super soft Poly-fil stuffing.
I chose a No Sew project so that anyone can make a cute stuffie whether you sew or not 'cause everyone loves a stuffie. Let's get started!
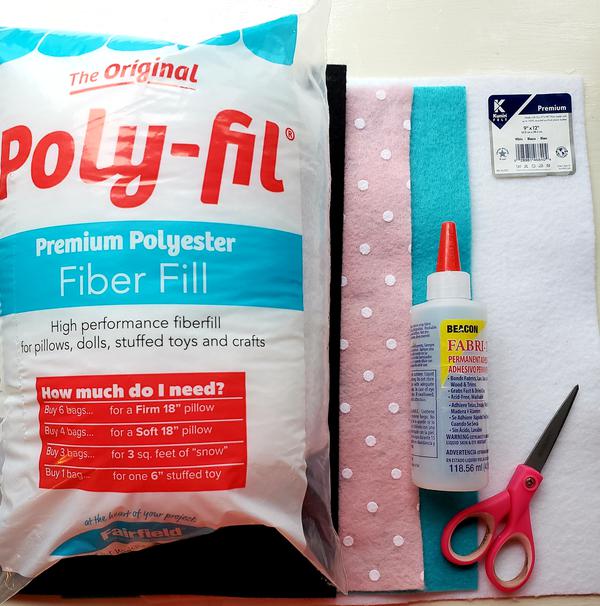
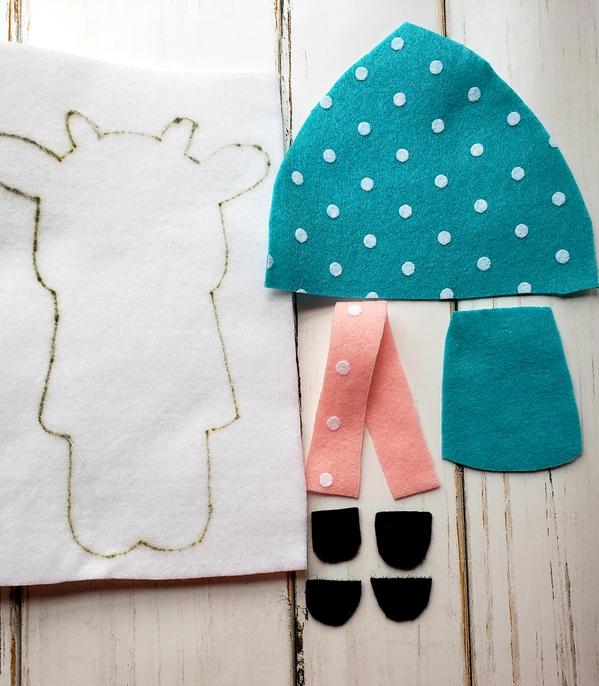
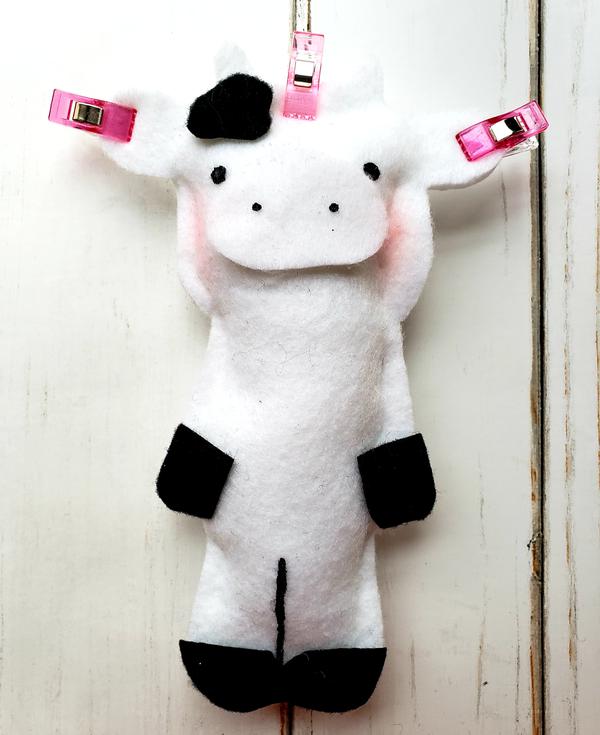
Print out pattern. Cut two body pieces, one snout from white, hooves and spot from black, sweater from lagoon. Cut a 1 1/2" by 8" scarf from pink. Fringe scarf ends. Cut a 6" along bottom by 5" triangle for hat. (You can add polka dots to felt with small white buttons, paint or pom poms if you do not find it at your local craft store.) I originally made this to be a a pocket to carry items but it is also a super cute stuffie!
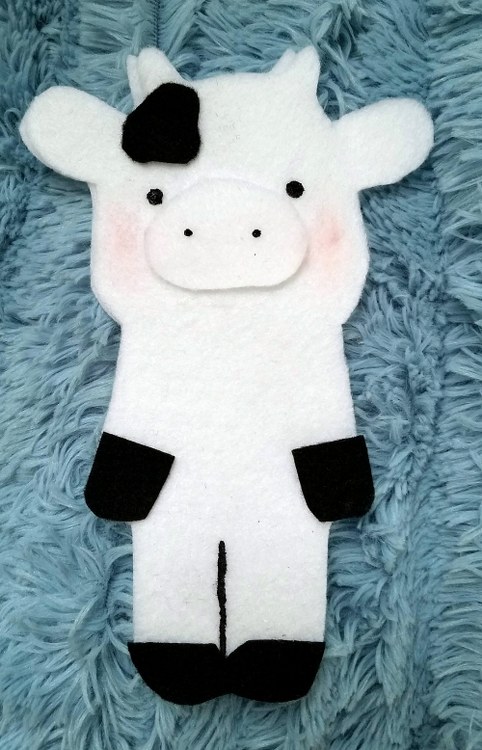
Align and glue body pieces together along edges, referring to pattern piece for opening at top marked by dots. Glue on spot, snout and hooves. Blush cheeks. Use black scribbles to make eye dots, nose dots, leg line. Blush cheeks. TIP: Apply a thin line of glue close to edge in 2" increments pressing pieces firmly together. I use Clover's Wonderclips to hold felt pieces especially when stuffing.
Stuff cow and glue head shut using clips to hold it. If any place on the seams opens up slightly, reglue and clip.
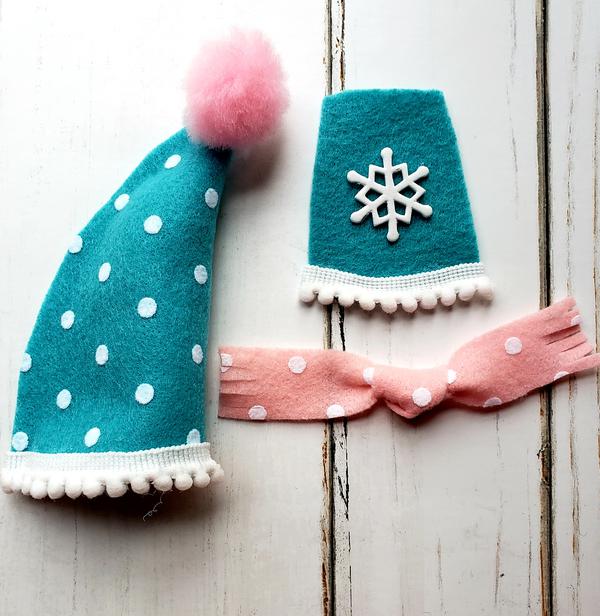
Glue on sweater, embellish if desired. Glue white peapod to bottom of sweater, trim ends with scissors. Tie scarf in center. Glue to neck. Add pom pom trim to bottom of hat. fold and glue sides. Stuff slightly. Glue pom pom on top.
Happy 80th Birthday Fairfield World! I have been using their products for forty years and am so very pleased to be part of their celebration! Follow them on IG @fairfieldworld to catch all of the creative projects!
October so much to love here on the East Coast of Canada! Happy to be sharing with some favourite peeps from the Creative Crafts Edition-Fall Decor Crafts! You can never have enough pumpkins, create a whole patch of these DIY Fast and Easy Felt Pumpkins! I went with a traditional colour palette for the kitchen brick fireplace however felt comes in a rainbow of colurs and so can pumpkins!
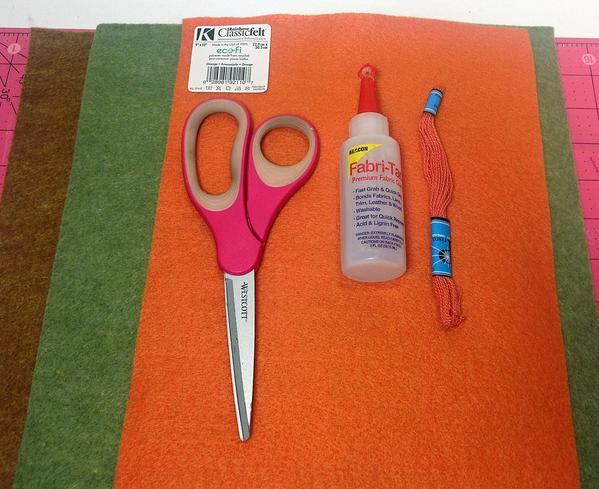
You will need:
12″ x 18” craft cut Kunin Premiumfelt™: 1 Copper Canyon
Pencil, ruler, scissors, embroidery needle, 8″ , 2″ circle template.
TIP: Create pumpkins in a variety of sizes using different circle templates.
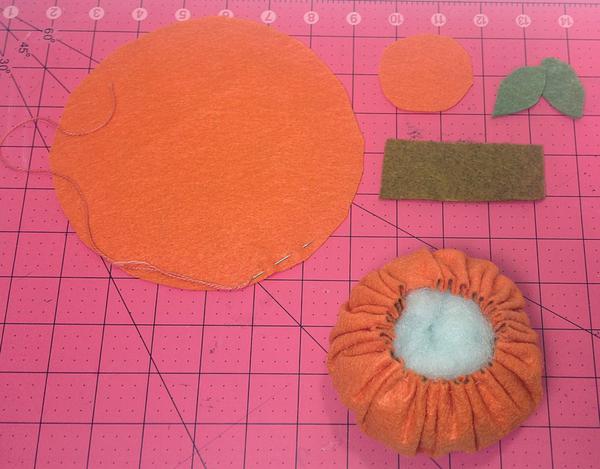
STEP ONE
Cut one 8″ and one 2″ circle from orange felt. Cut two 1 1/2″” oval leaves from olive and a 1 1/2″ by 4″ piece from the classic copper canyon piece.
STEP TWO
With the floss stitch around the outside edge of the large circle. Pull stitches tight leaving a 1 1/2″ opening. Stuff. Glue 2″ circle over opening. This is the bottom of the pumpkin.
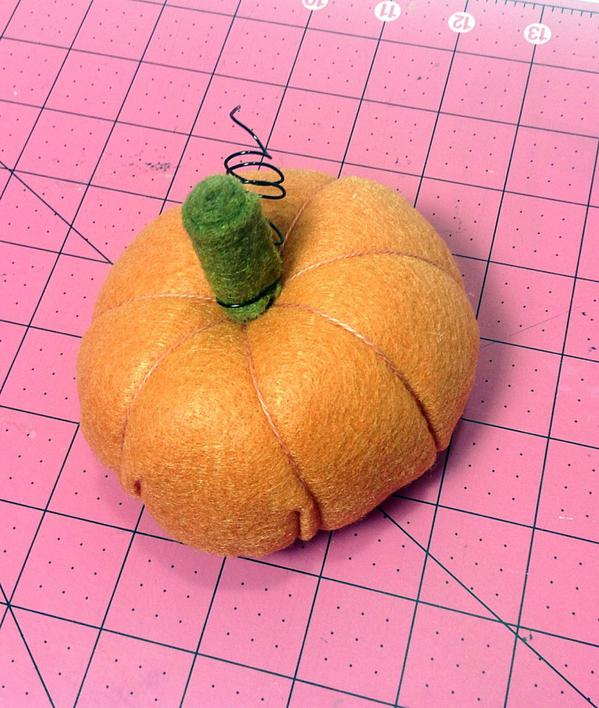
STEP THREE
Stitch floss to center bottom of pumpkin. Bring floss over one side of pumpkin to center top. Stitch through center top and continue to bottom of pumpkin again pulling stitches to make an indentation. Repeat dividing the pumpkin into eight different sections. Secure floss at bottom.
STEP FOUR
Add leaves. Optional: add wire vine by rolling piece of wire around a pencil.
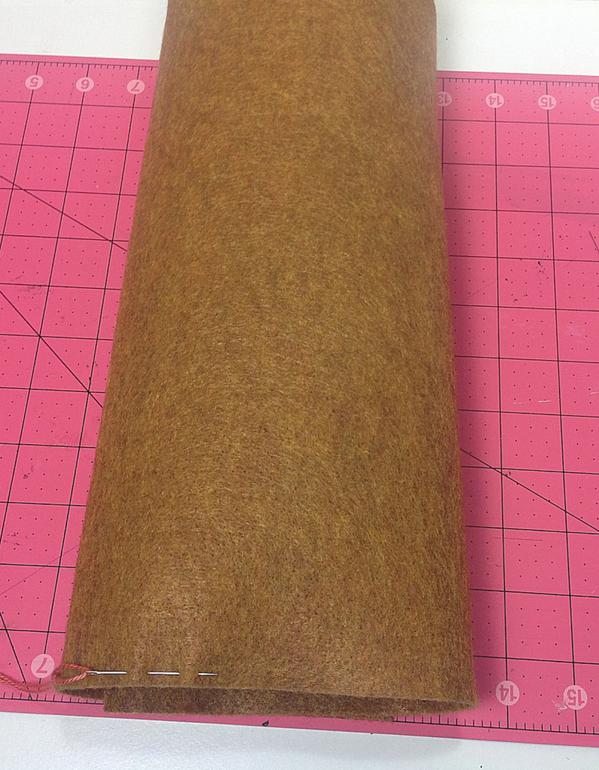
STEP FIVE
To make the tall pumpkin roll the premium copper canyon piece into a cylinder overlapping ends. Glue. Sew around edge of both bottom and top of cylinder. Pull stitches tight at bottom. Stuff and then pull the stitches tight at top. Repeat Step 3.
STEP SIX
Cut two 2″ leaves from olive and a 1 1/2″ by 4″ stem from sandstone. Glue stem to center. Glue center of leaves pinching shut. Glue leaves to stem.
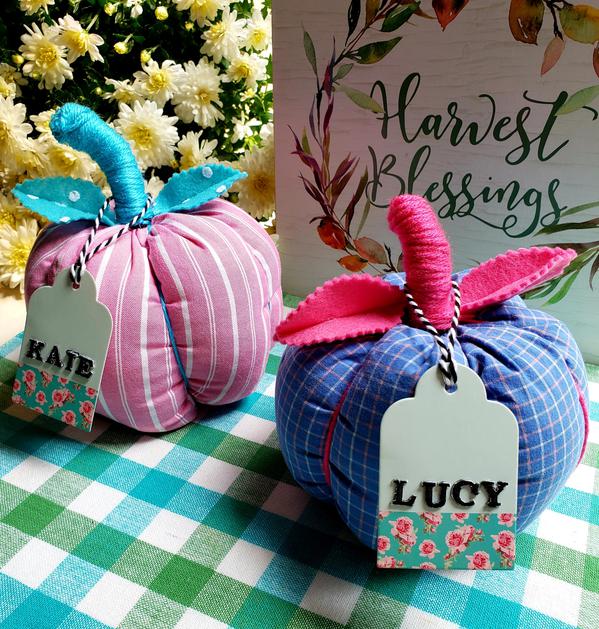
Ta Da! DIY Fast and Easy Felt Pumpkins. Make your own patch or personalize for gift giving with different colours and name tags. Be inspired with more Fall Decor by our creative bloggers. Just click on the Link in the sidebar!
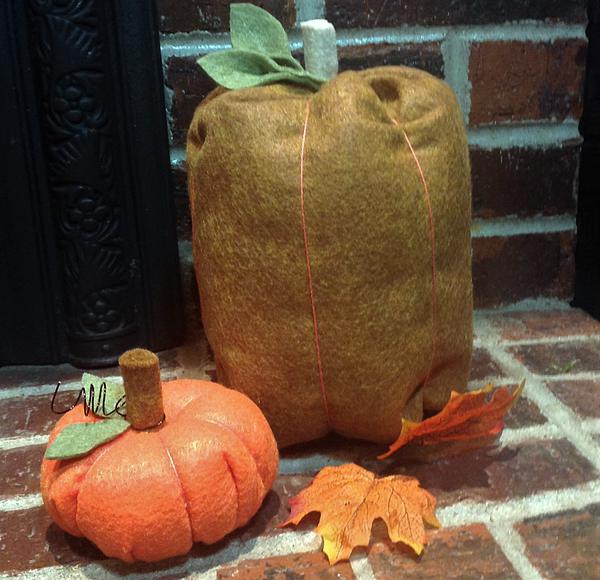
It is pumpkin season! My No Sew Recycled Fabric Pumpkins are made from the sleeves of my husband's cast off shirts. This year I was inspired by the fabuous Beth Eaton's Stuffed Fabric Pumpkins, part of Fairfield World's 80th Birthday Celebrations! Beth gives a full tutorial and video on her blog. These are so easy to make!
I am very excited to be part of the Creative Crafts-Halloween Edition. Link in Sidebar to all of the talented crafters and designers taking part! This is Day 3!
Now let's make a No Sew Recycled Fabric Pumpkin!
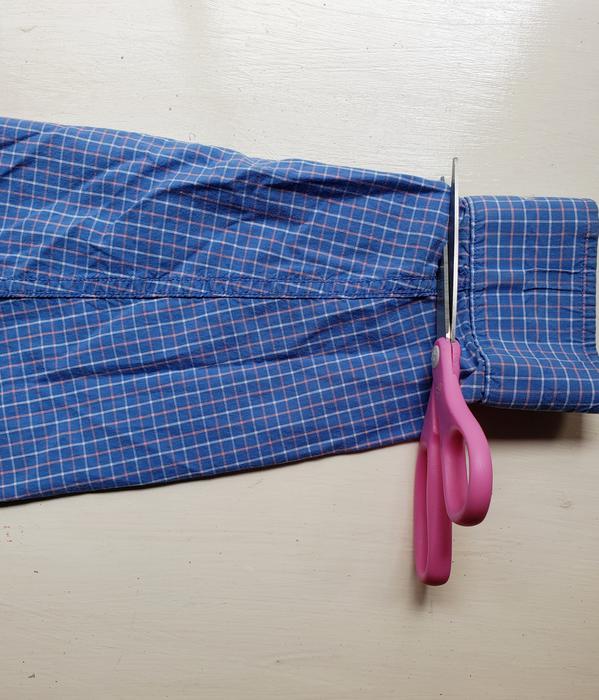
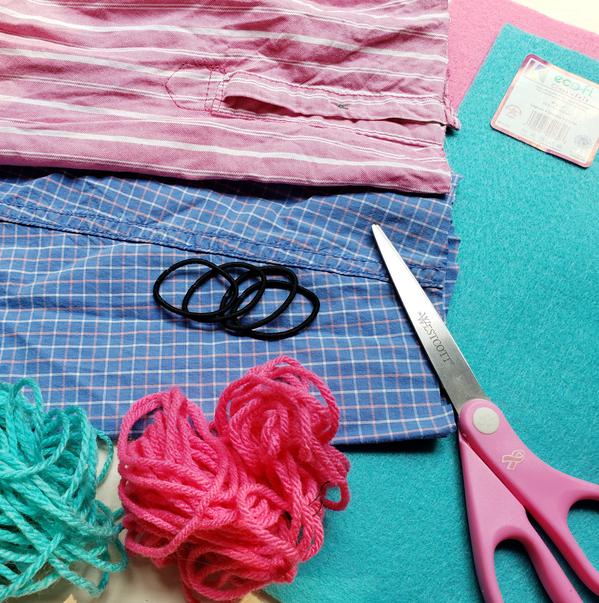
For the fabric you need a long sleeve shirt. Cut off the sleeves and cut off the cuffs.
You will also need:
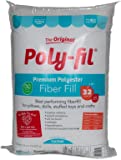
Fairfield World Poly-fil
Twine or Yarn
9" x 12" craft cuts Kunin Felt Brand, color of choice
2 Hair Elastics
Hot Glue and Gun
Scissors
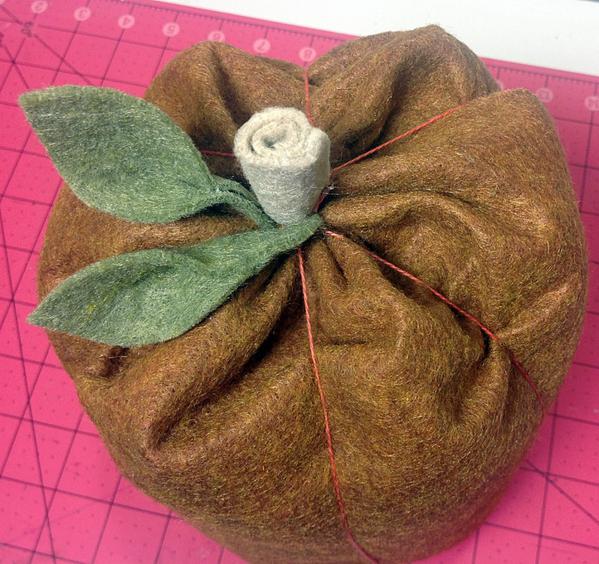
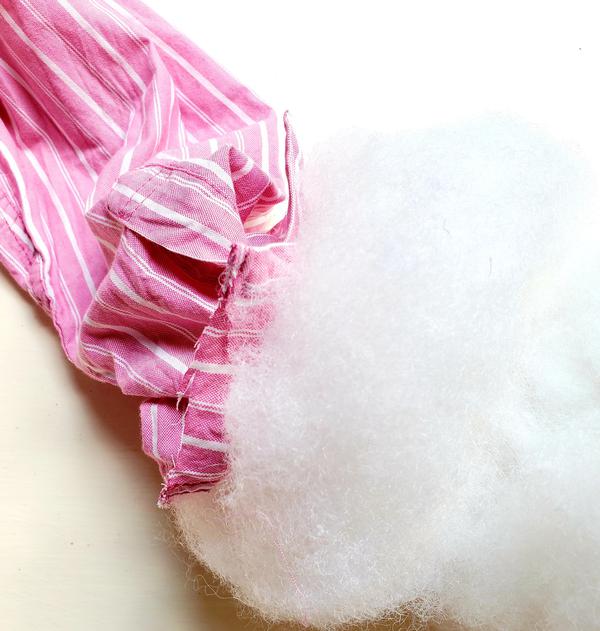
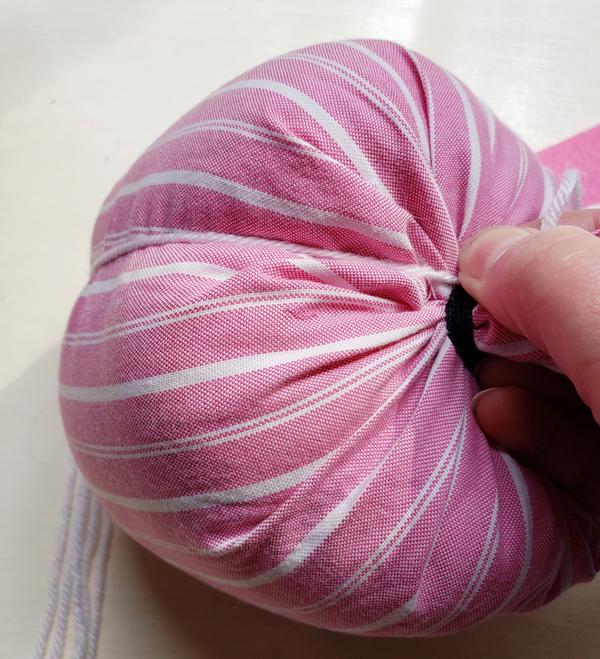
In making the pumpkin with a sleeve you do not have to glue a seam. Follow Beth's instructions for the yarn or twine and tying off bottom of pumpkin. The sleeve is tapered so I used the wider end of the sleeve for the pumpkin. Stuff halfway with Fairfield Poly-fil. The hair elastics are fabulous for tying off the pumpkin. Had extras of those on hand too!
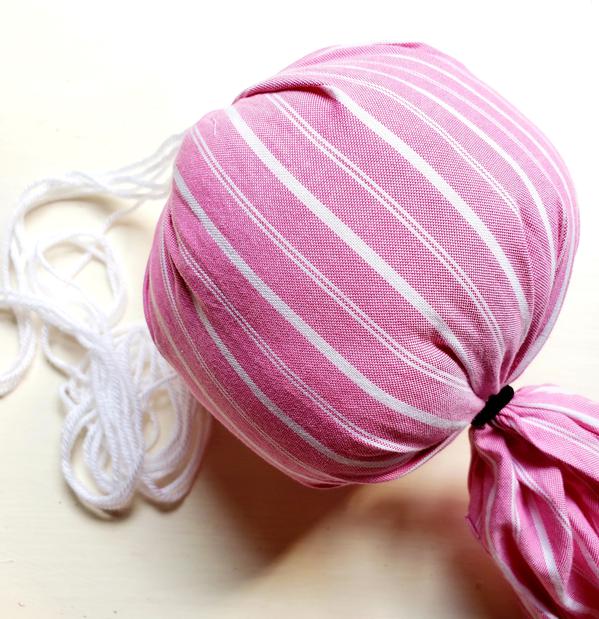
Pull the yarn or twine tight up over pumpkin and wrap around excess fabric at top.
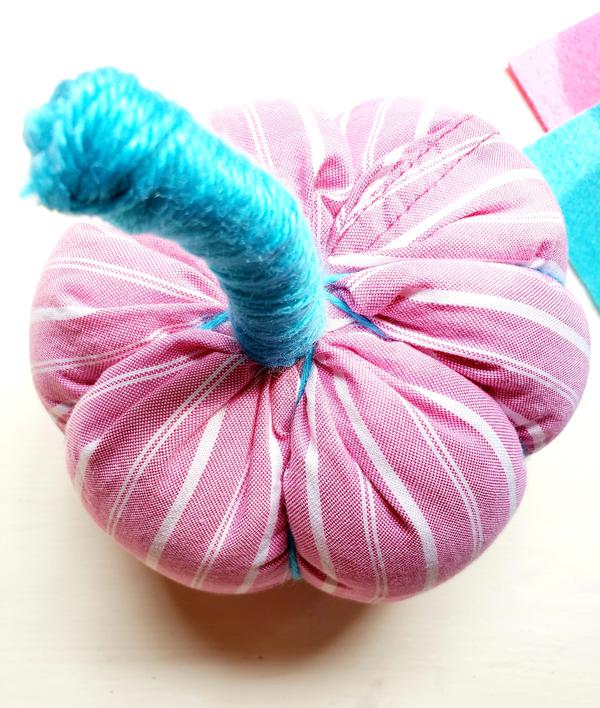
I cut off the excess fabric with a few inches of yarn left and used the hot glue to wrap right over the raw edge at the top.
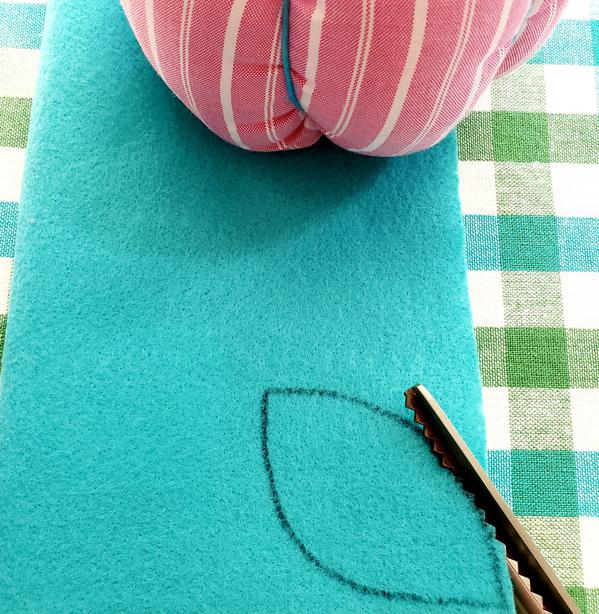
Cut felt leaves with scissors or pinking shears if you have them. You could also die cut them as well.
Glue a thin seam down center of leaf. Press a seam, glue to top of pumpkin.
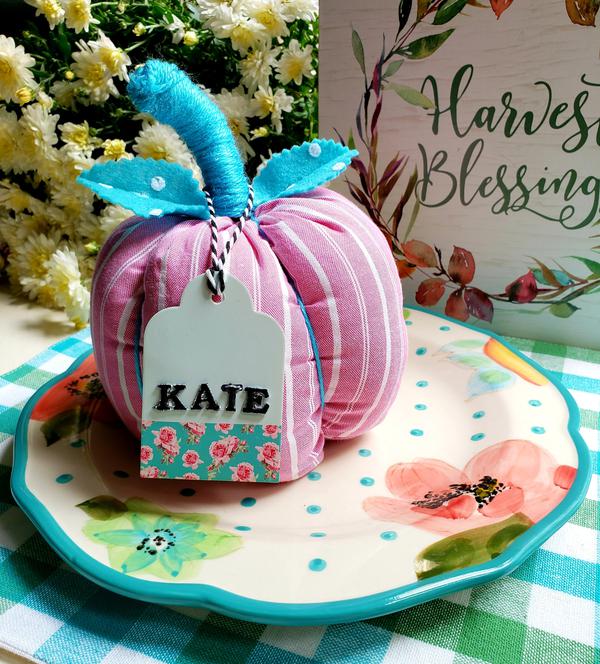
I am planning to make everyone their own personal pumpkin for Thanksgiving. My husband has lost wieght and got himself in great shape and health however he is sad about losing some great shirts including his favorite fishing shirt! So guess what pumpkin he is getting.
Check out more wonderfully creative Halloween crafts by clicking on the link in the sidebar!
Till next time!
Debra
Find me on IG @debraquartermain
Posted by: Debra Quartermain AT 12:15 am
| Permalink
| Email
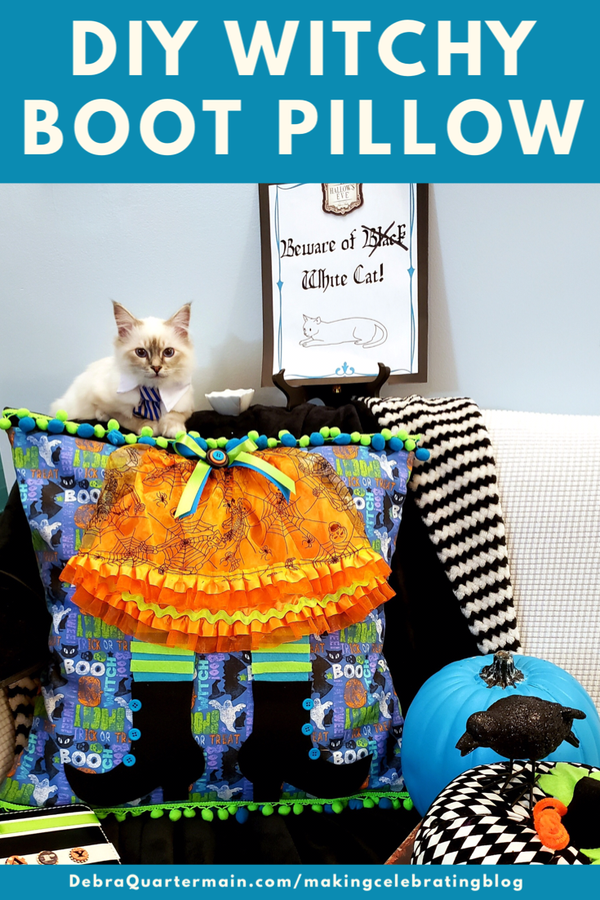
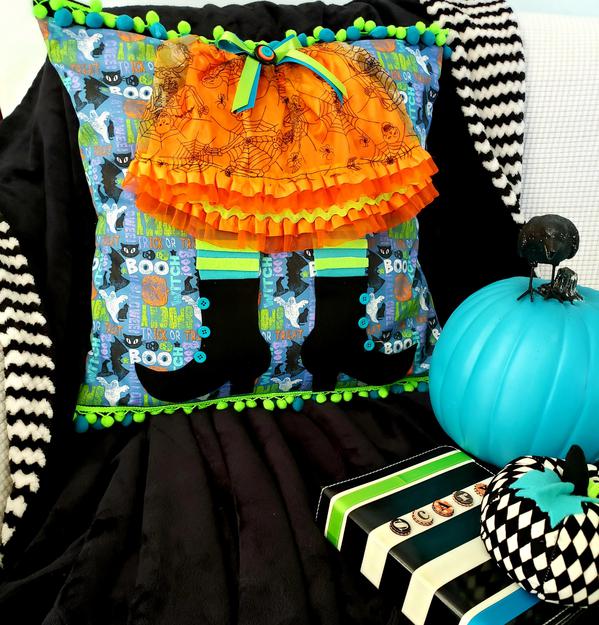
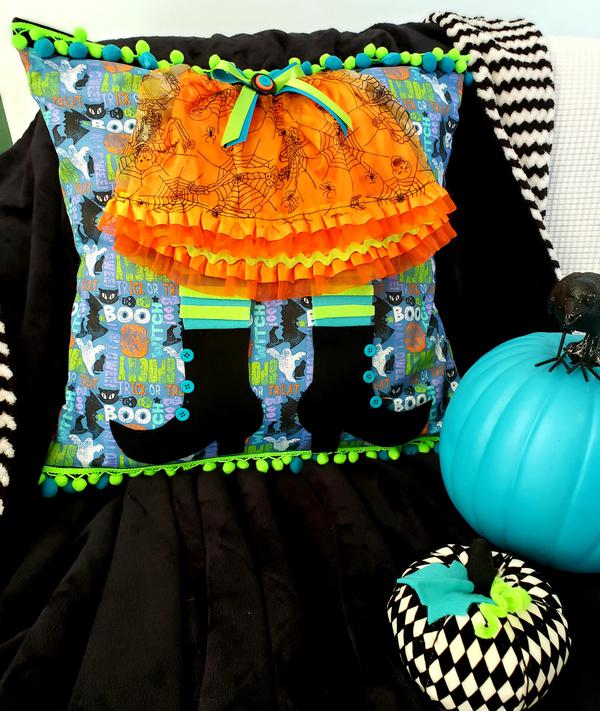
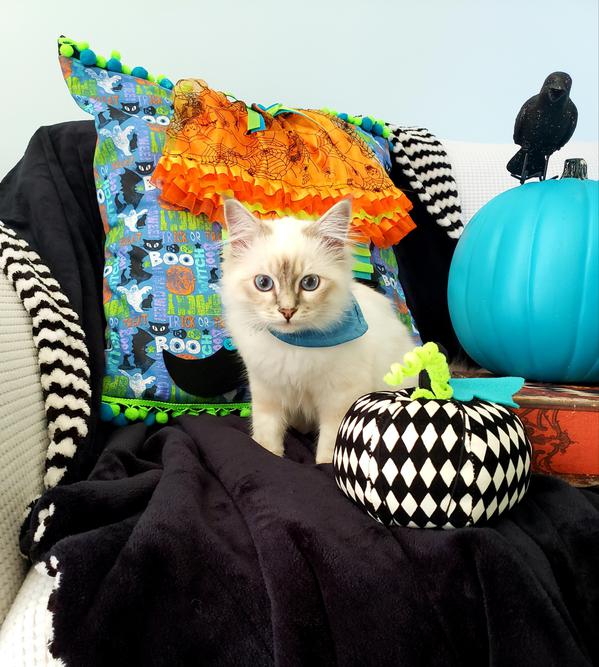
Fall is coming and bring on the decor! Decking the halls and everything else for Halloween this year in punchy colors! Check out this DIY Witchy Boot Pillow I designed. (This post is sponsored by Fairfield World but all opinion and comments are my own.) This year is extra fun for me along with the grandlittles we now have our Birman kitten Rory to add to the Holidays! Here he takes his role of Scary Watch Cat very seriously.
In designing this pillow I used some of my very favorite products, The Premier pillow insert from Fairfield World. Comfy and keeps it's shape felt from Kunin Felt Brand, punchy pompom trims from Trims by the Yard. The grandlittle girls had outgrown the dollar store Halloween skirt so I cut it in half added ricrac for the witches skirt. Seriously what witch would not like a ruffled with ribbon and tulle!
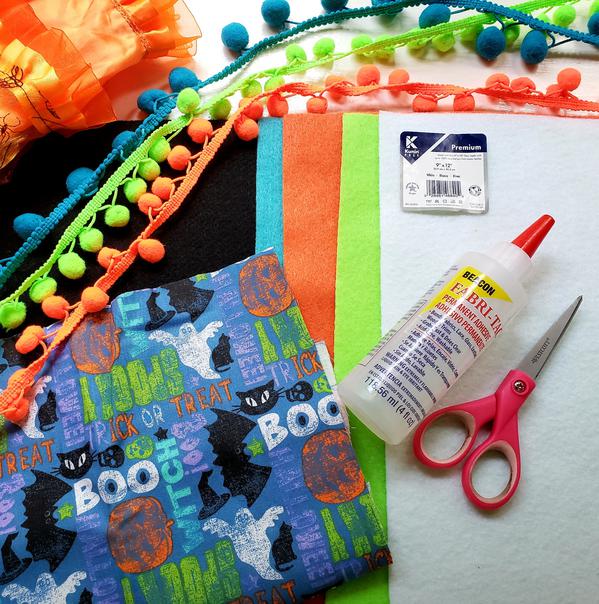
You will need:
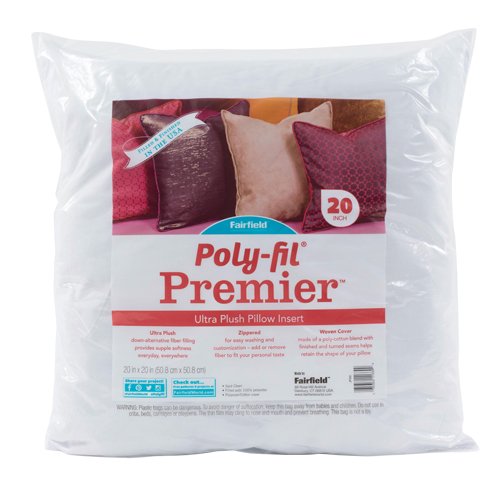
20" Pillow Form Fairfield World
20" Square Fabric for front of pillow
1 yard Kunin PremiumFelt: Black for back of pillow
3- 9" x 12" craft cuts of Kunin Classic or Prestofelt: (1 of each) Teal, Neon Green, Black
1 1/2 yards each Pom Pom trim: Teal, Lime Green
1 yard ricrac trim: Lime Green
1 yard assorted Ribbons
6-8 Buttons to co-ordinate
Fabri-tac by Beacon Adhesives
Dollar store
Scissors, sewing machine and matching thread. (Could be no-sew as well using the Fabri-tac.)
I used the Premier Pillow Insert from Fairfield World but for crafting projects, holiday or every day couch pillows they also have a 2 cushion value pack. I like the quality of the Premier. All of their products have been my favorites to use over the past fifteen years. The bonus of the envelope style pillow is just slipping off the cover and putting on a new one, economical both for cost and storage. Yes we are all about storage these days! Just remove cover, flat and ready to store!
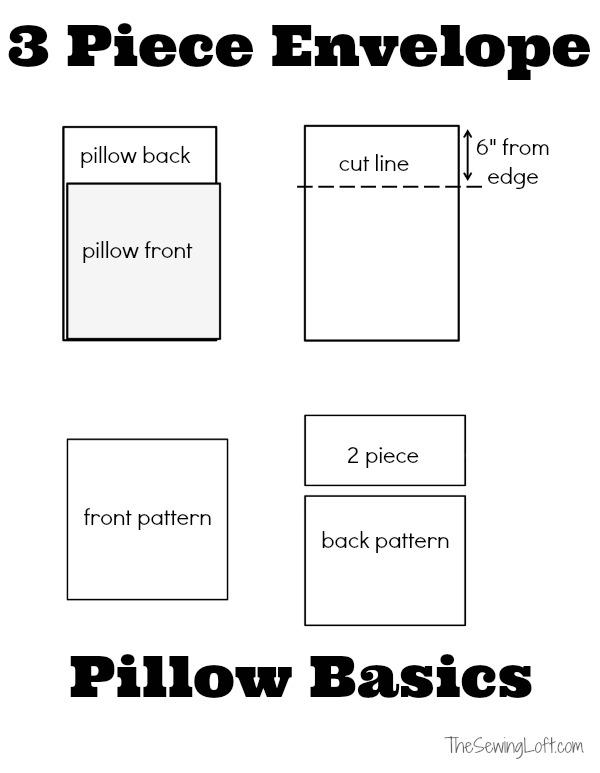
STEP 1: Make the Pillow
The easiest style of pillow I like to make is the Envelope style. Here is a great tutorial and illustration by The Sewing Loft. I used a 20" pillow form so the finished pillow is 19" square. (It is recommended to make your pillow an 1" smaller than the form by Fairfield World.) The pillow is nice and plump!
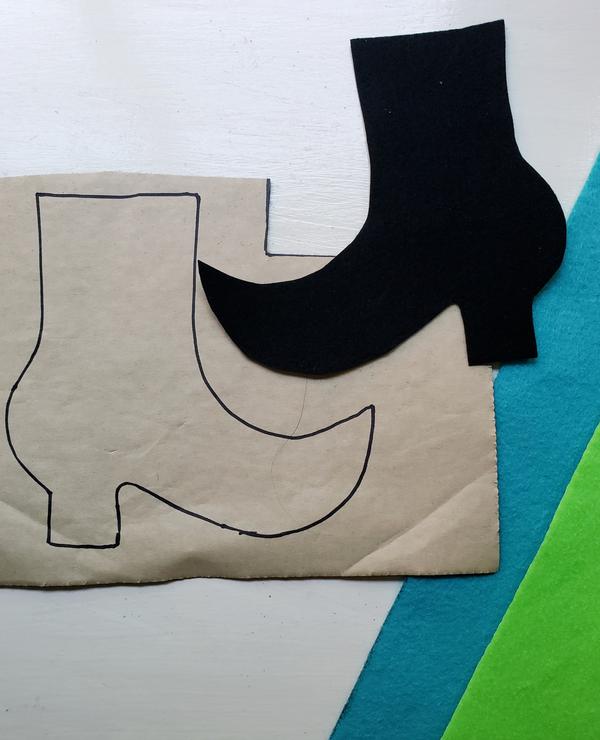
STEP 2: Make the Boots
As this is a popular theme and of course Witches always wear boots you can find several different styles of boot patterns to use. I used this one from Lindseys PaperScraps but there are many others on Pinterest to choose from. This style reminded me of a pair my Grandmother had. She was the best Witch ever, always had time to show us a little magic!
Print pattern, cut and trace onto Prestofelt back or use chalk to trace on regular felt two boots. TIP: Prestofelt make sure to reverse pattern or she will have both boots facing same direction. Cut out 3" by 9" pieces of green and teal felt for stockings.
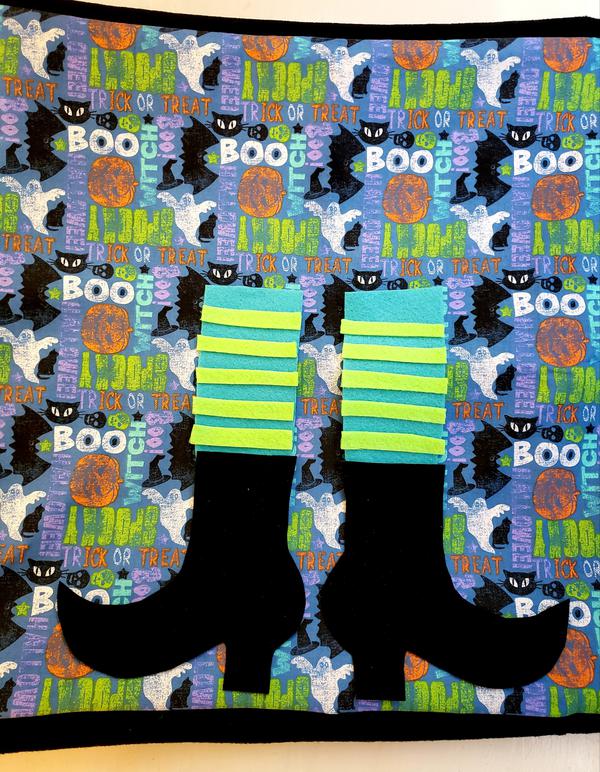
STEP 3: Making the Legs
Decide which felt you want for the main leg color and then cut 1/4" or so strips from the second color for stripes. Adhere stripes to stocking and place stockings and boots as shown on pillow. The stockings are extra long but with her flouncy skirt she needs long ones and of course the wind, you never know! Glue in place.
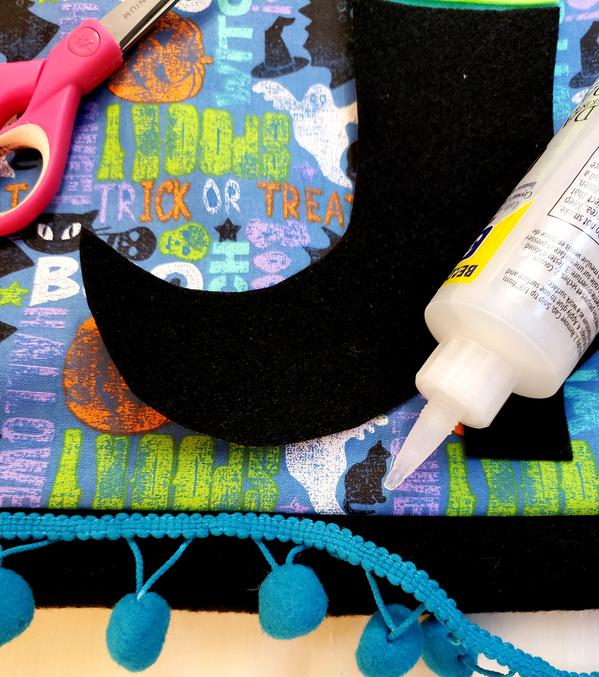
STEP 4: Adding the Pom Pom Trim
I find the easiest way to apply pom pom trim is using a quality fabric adhesive. Fabri-tac by Beacon is my go to. Glue in from edge of pillow front 1" along top and bottom of pillow. Repeat with second pom pom trim staggering them.
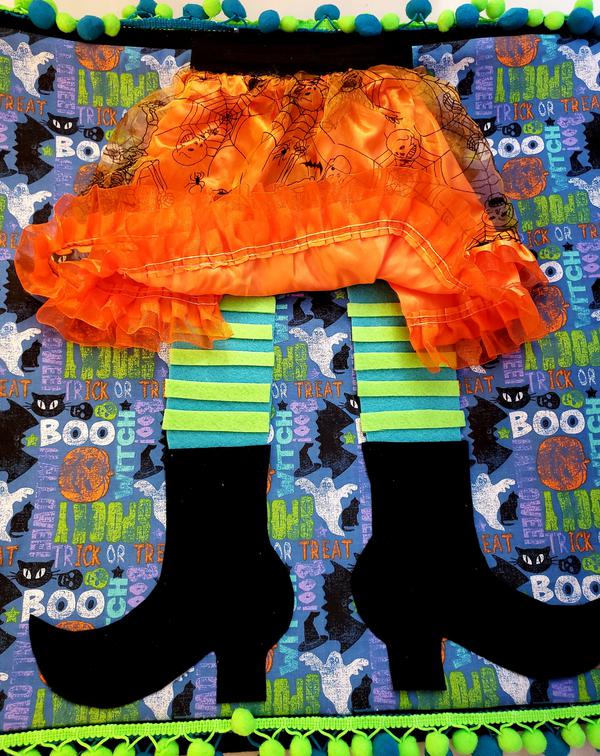
STEP 5: Adding the Skirt
I cut the skirt open down the back seam and then cut it in half. Fold under the raw edges. Place on pillow. Glue along top and side seams to pillow front.
Add finishing touches as you please. Personalize with buttons and ribbons or maybe a spider applique or whatever you like! Insert pillow form . You can also add a hook and loop closure at back.
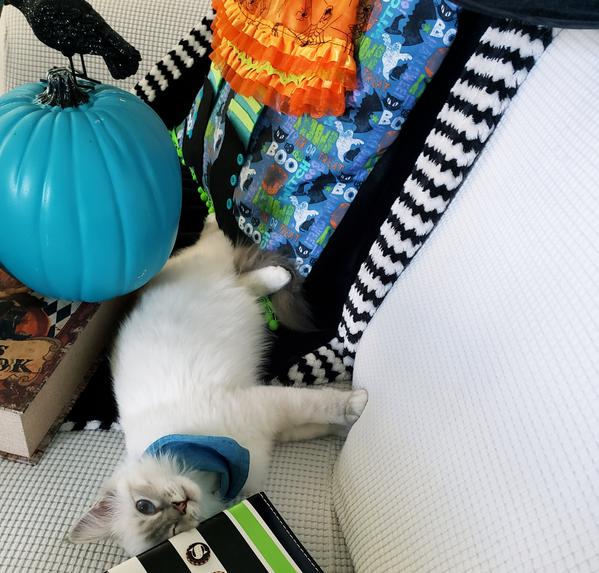
Rory decided this was a cozy spot to be and still stayed in character as the Scary White not Black Watch Cat!
There were several out takes from this shoot.
Hope this post sponsored by my friends at Fairfield World gets you inspired to be thinking of Fall Decor and beyond. A pillow insert can take you through every holiday and season. More to come!
Magical Mimi to Grandlittles, I love to create, decorate & celebrate. Sharing joy and inspiration from our 200 year old home, Quartermain House B&B on the east coast of Canada.


