|
the CEO! Creative Eternal Optimist! Blog
|  |
Sunday, March 30 2014
Springtime, Easter and an upcoming Baby Girl Shower have me thinking bunnies, bunnies and more bunnies! Smoothfoam have these hollow sphere halves which come in a variety of sizes. I decided to make a mobile to hang as a centerpiece over the dining room table for the baby shower. Of course the theme being bunnies my new Sizzix bunny diecut was perfect and of course the bunnies had to wear tutus!

You will need:
Smoothfoam 12" Hollow Sphere
9"x12" craft cuts Kunin Classicfelt, 3 Candy Pink, 3 White, 1 Yellow
9" x 12" craft cuts Kunin Printzfelt, 2 Saralma
3 yards each of 4" wide tulle, pink, white
1 1/4 yards each of 1" wide Ribbon, white, pink, yellow gingham
1 1/4 yards each of 1/2" wide Ribbon, pink, yellow, green
6-1" Buttons, yellow
4-3/4" Buttons, green
6 Flower Buttons
Bunny, Flower Dies by Sizzix
Fabri-Tac by Beacon Adhesives
Big Shot or Fabi, rotary cutter, cutting mat, scissors, needle and white thread, ruler, measuring tape.
How to:
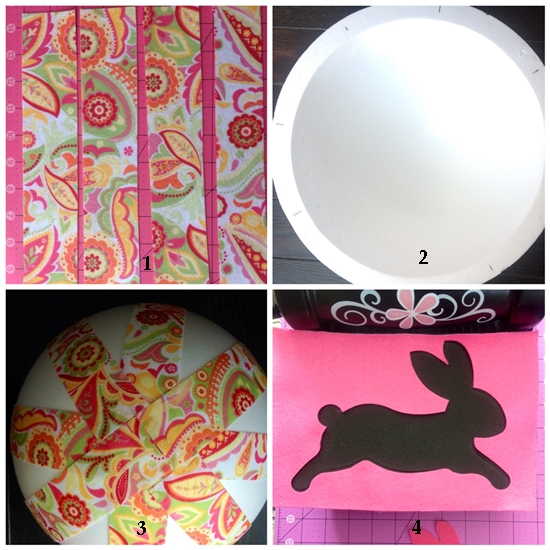
1. From the Saralma cut eight 2" by 12" strips. Cut the white, pink and yellow felt pieces in half to measure 6" by 9". Photo 1
2. Die cut four white and four pink bunnies. Die cut two pink, one white and one yellow flower set. Glue bunnies together in pairs. Layer flowers beginning with two large pink, one white and one yellow. Glue three layers together for each flower. Photo 4
3. Cut tulle pieces in half. Fold pieces in half and sew a basting stitch through both layers. Pull tight to fit around bunny's waist. (Not sure if bunnies have a waist? ;) Secure stitches. Repeat for all four bunnies.
4. Tie four yellow and four pink ribbons for bunny necks. Glue in place. Cut four 8" pieces of green felt and make a knot at one end. Glue knot to top of tutu on each bunny. Set bunnies aside.
5. Use ruler to mark edge divided evenly in half, in half again and repeat once more to make eight. Place a 2" width of felt on flat edge with mark centered in middle of strip edge. Stretch felt slightly over curve and glue at center top. Repeat for eight pieces. Tip: To remove bulk at center top trim remaining pieces to just meet the first two joined at center. Photo 2 -3
6. Glue white ribbon around edge extending 1/2" beyond sphere edge. Glue yellow gingham ribbon over top of white ribbon.
7. Cut a 3" piece of the white ribbon and make a loop. glue to center top. Cut pink ribbon in half and tie two bows. Glue to either side of loop. Glue yellow button to center of pink bows. Add a flower button to centres.
8. Alternate around gingham border, centered on the felt strips, a yellow button with a green flower center and the layered felt flowers.
9. Glue end of bunny ribbons alternating at center of every other felt strip.
The rest of the Smoothfoam design team are playing with the spheres too! Check out the Smoothfoam blog April 1st! Check out the Kunin blog too! I am their Design and Social Media Co-ordinator and we have some great projects happening! Keep creating! 
Thursday, March 20 2014
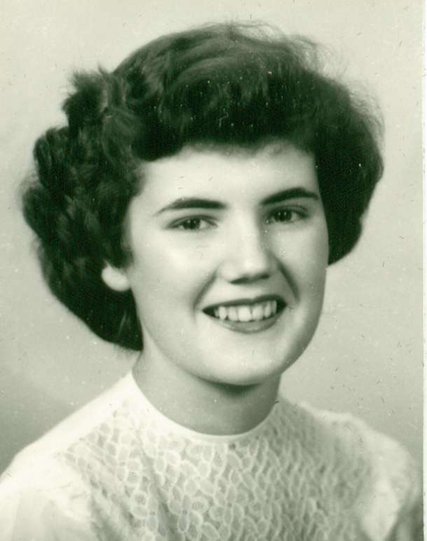
March is (inter)National Craft Month and Kathy Cano-Murillo aka Crafty Chica posed the question and wrote a wonderful blog post on "Why She Crafts". So why do I craft, the question is especially poignant for me this month. My Mom was born at the beginning of March and passed away at the end of March four years ago. The reason I craft, sew and create is because of my parents, my Mom. My first crafty memories are of sitting on the front porch in the summer with my little sewing machine sewing scraps from the material my Mom was making all of our clothes from. She would make herself a dress, me a jumper and my doll a skirt.
One of my other favorite crafty pastimes were the big sheets of newsprint my Mom would fasten up for me on the wall with a house drawn on it. I had the old Sears catalogue, scissors and a bottle of glue. What fun was that furnishing a house!
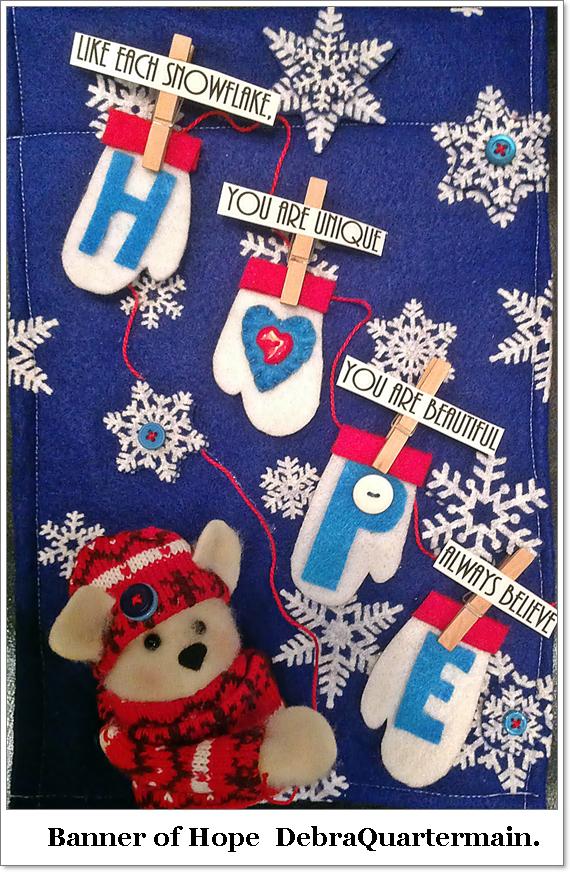
What is most remarkable is my Mom did all of this with me even though she never knew what it was like to have a mother or a home of her own. I created this Banner of Hope in memory of my Mom for Hope is ...a Place to Call Home.
My Mom was the result of an affair between a young Salvation Army officer and an older married woman he was staying with. A definite scandal in those days. Disgraced her father went into hiding after dropping my mother off at his Aunt's nursing home. Her mother did not want her. There my Mom spent the first six years of her life, her earliest memories of helping out with the residents, not happy ones. She was given a name, Bessie. From there her father picked her up but never said he was her father, she was then boarded out at different places for the next several years, much she would never talk about.
Why I craft, why I am creative is because of my Mother. She was always so proud of what I did and many of my designs would be proudly displayed in her home. She encouraged and supported my "making things".
I sew and craft because time stands still and imagination flows, the results are satisfying and most often make me smile. I went on to have two beautiful daughters and many crafty adventures with them. I love to share my ideas, my projects and techniques, teaching and see the smiles that brings. Basically I just love to make stuff and have found these most wonderful kindred spirits who do too. The most amazing of all, my Mom! With love, Debra
Monday, March 03 2014

It is that special Monday! The 1st Monday of the month and the Designer Craft Connection Blog hop is happening. A group of professional international designer members of the Craft and Hooby Association share projects, products, techniques and above all else inspiration!
This month we are sharing our favorite products and techniques, mine is a long time favorite with exciting new patterns and textures. I have been working with Kunin felt forever, well almost :). Love their new patterns like this Fancifelt Moroccan. The bib flower necklace below is an Embossfelt Cobblestone. Along with my favorite product, flower making techniques. Felt flowers are everywhere!
Want to make the cool flower with the picture cube check out how to here on the Smoothfoam blog.
The Flower bib below tutorial will be on the Kunin Blog tomorrow. Love the gray with my lavender sweater.

So check out the how-tos for these fabulous flowers and check out by hopping with the button sidebar all of the amazing projects, products and techniques by my talented designer friends! To the Joy of Creating! Debra
Friday, February 14 2014
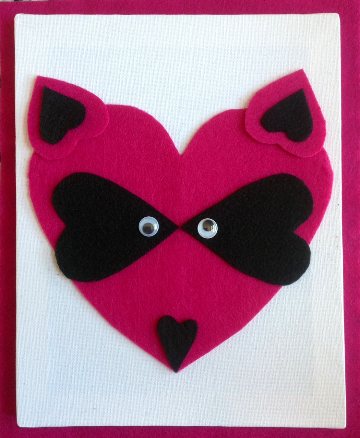
"What does the Fox say?" Happy Heartfelt Valentine's Day! I have been seeing crafty foxes all over Pinterest so with a few hearts here is my fuschia fox! I always remember the fox from school, a simple word with an X in it and writing it over and over and over....All you need for this little guy is a sheet of Fuschia and Black Kunin Classic Felt. Cut an 8" heart, two 2" hearts from fuschia, cut two 3" hearts, two 1 1/2", one 1" heart from black. Glue hearts as shown and add wiggly eyes.
This is a cute wall hanging glued to a small canvas. It is also a fun activity for a kid's Valentine or birthday party. Classic Felt comes in a variety of bright colors so this little fox can be created in many color combinations. Set out some colors and see what they come up with!
"What does the Fox say? " Indeed Happy Heartfelt Valentine's Day! Debra
Monday, February 03 2014
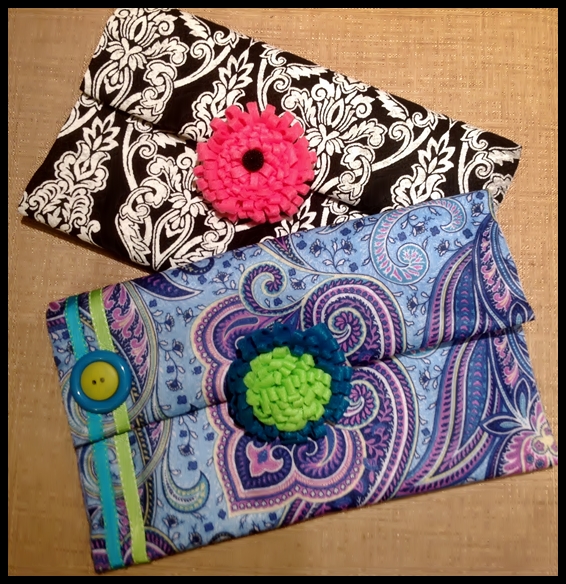
It is the first Monday of the month and we hop with the DCC Designer Crafts Connection! The button is in the sidebar and you can hop along to see an array of awesome projects! Our theme this month is "What's New"! I thought I would share one of my favorite products and the gorgeous color and patterns it comes in, felt! The Kunin Group produces an eco friendly felt Ecofi is made from chipped up recycled plastic bottles. It is wonderful to work with and the patterned felt comes in many designs. I made the same simple envelope clutch from two of their patterns .I write their new blog now and feature a project every week. I love working with their felt!
To make these quick and easy clutch purses:
As an accent for each clutch, a flower clasp. The mum simply two strips of felt, folded, slits cut, rolled and glued. Using a pin back to attach to purse makes it possible to wear separately or change on the purse to co-ordinate with another outfit. (The clutch can be sewn as well, where the steps refer to gluing, replace with sewing.
Finished Size 8” x 12”
-- Kunin CraftCut 9" x 12" ClassicFelt™ in Candy Pink
-1 Kunin CraftCut 9" x 12" ClassicFelt™ in Neon Green
-1 Kunin CraftCut 9" x 12" ClassicFelt™ in Aqua
-1/3 yard Kunin Fancifelt, Legacy
-1/3 yard Kunin Printzfelt, Paisley
-1 black Button,1/2”, green 1”, aqua 2”
-1/2 yard each 3/8” ribbon
-2 Hook and loop closures or snaps
-Fabri-tac glue
Tools: sharp scissors, cutting mat and rotary cutter, measuring tape, needle and thread, optional.
-
Cut a 12” by 36” piece each of the Paisley and Legacy for the clutch. Cut two 2” by 12” pieces of Candy Pink for flower and one 1” by 12” piece for inside piping. Cut one 2” by 12” piece of Aqua and one 2” by 12” piece from Neon Green for flower and 1” by 12” piece for inside piping. Cut two 20” pieces from each ribbon.
-
To make clutch. With right sides out fold felt in half, glue edges. Piece will now measure 9” by 18”. Finger press piping strip in half. Glue strip over the 12” raw edge side. Fold end with piping edge over again 6 ½”. Glue sides leaving piped edge open. Fold over opposite edge 4”. Finger press.
-
For paisley clutch glue ribbon around one end. Glue on buttons. For both purses sew or glue hook and loop fastener to the center on the piping and second piece matching to the opposite side, the inside top of the clutch.
-
Making the flower. Fold a felt strip in half; begin cutting evenly spaced slits from the folded center to the edges leaving ¼” uncut. Repeat for second strip. Keep strip folded and begin rolling, glue as you go. Continue until one strip is finished. Add the next strip and repeat. Glue or sew pin back to flower. Pin or glue to purse center. Glue button to center of pink clutch.
Thanks for stopping by! Keep creating! Debra
Monday, January 27 2014
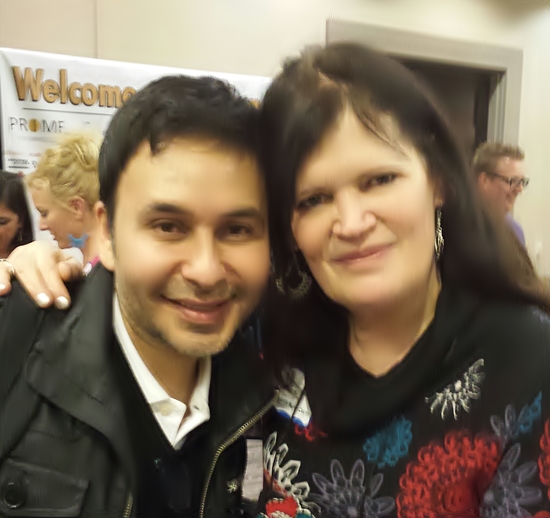
CHA, the Craft & Hobby Show 2014, what a great show! Here I am with one of the nicest guys in the business Mark Montano of Make Your Mark. Super talented and super nice. Here we are hanging out at the Prime Publishing (Favecrafts)blogger event, what a great evening, food fabulous, lots of swag and connections. The craft industry has the best people, super talented and super nice! Thank you Prime Publishing!
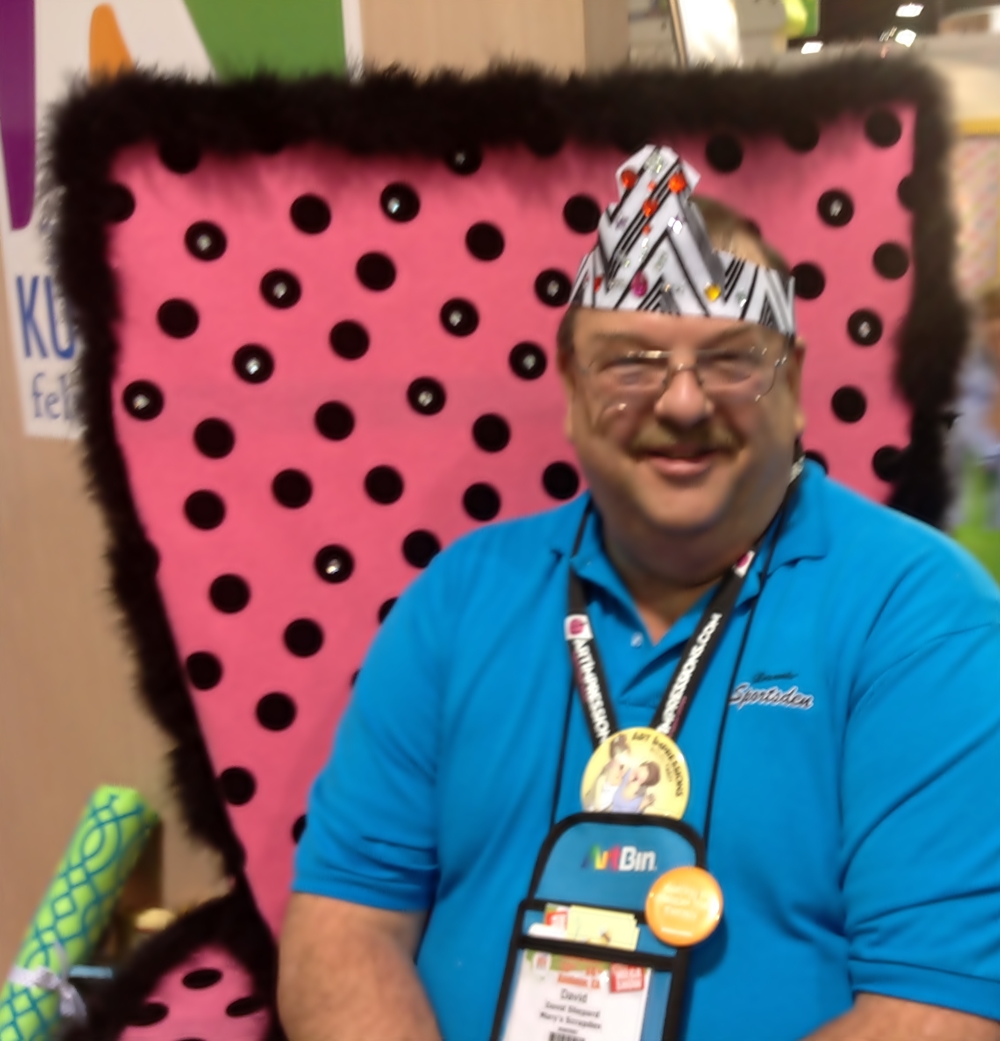
Over at my favorite hangout, the Kunin booth we were crowning royalty. I built a throne from pink polka dot felt and the attendees made fun felt crowns.
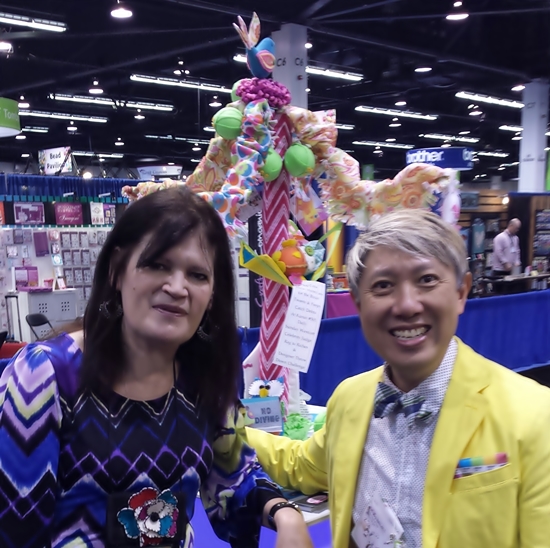
In the land of Palm trees I built a Palm tree of my own in the Designer Showcase with some bright and lively prints from Kunin. Designer friend Jonathon Fong "Style with a Smile" even dressed to match my display! :)
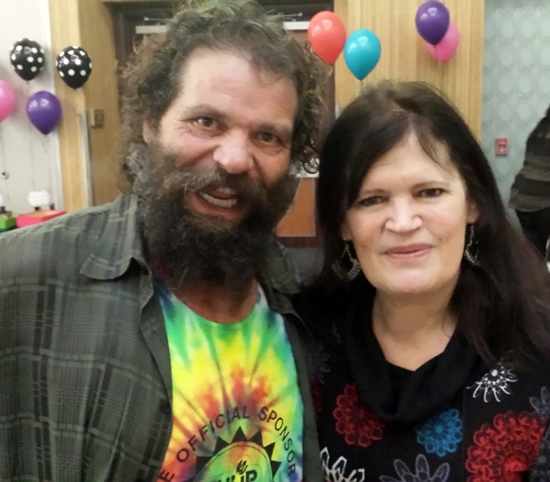
Since I survived the CHA flu bug, here I am with Suvivor Superstar Rupert. Tiedyed up a storm all day without gloves, hands a very interesting color. We caught up at the I Love to Create pampering party.
There is so much more, catch up with more details on my blog over at Kuningroup.com. What a wonderful company, they were the best to work with at the show! I had a great time in the booth. Thank you to all who made the show such a great success! Debra
Monday, January 06 2014
It is the first Monday of the month, the Designer Connection Blog Hop is on, our diversely talented group of designers is showcasing this month's theme with favorite techniques, tools or products. We are all also scurrying the last few days before the trip to the CHA, Craft and Hobby trade show in Anaheim. I am excited to be involved in several events and working with the Kunin Group Felt Fabric and Crafts at Booth 501. I write their new blog and enjoy sharing my love of their product.
The seasonal felt embossed with several designs is fun, festive and colorful! One of my favorites is the snowflake design. Much warmer to handle than the real stuff that is piled five feet high outside! An easy technique to create dimension is to cut out individual icons from the felt and sew to the matching icons on project. Varying dimension can be achieved by layering two, three or even more icons on top of each other. Beacon's Fabri-tac is an excellent glue for felt. Finish off with a colorful button. I am a big fan of the bright collection from Laura Kelly.
I used this easy technique in a project dear to my heart, the Banners of Hope CHA Designer project. Led by the new Fabric Arts Council of CHA individual banners with messages of Hope are being created in every medium. In my post on Tuesday over on the Kunin Blog I give all details. Create & enjoy! 
Monday, December 16 2013
The year is coming to a close and for me 2013 has been an exciting one indeed! I recently got married after 20 years on my own raising two darling daughters, opened a 5Star B&B in a historic property along the river in pretty Fredericton, NB, Canada. New wonderful beginnings and now another exciting turn to where my design career began with Kunin Felt.
I have always loved working with felt and have my entire life. My professional design career began with felt and now I am working with the Kunin Group, writing their blog twice a week and preparing some fun demos at the CHA, Craft and Hobby Show in Anaheim in January. The Kunin Blog by Debra Quartermain http://kuningroup.com/2013/12/09/kunin-craft-blog-debra-quartermain/
To new beginnings!
Debra
Friday, November 15 2013
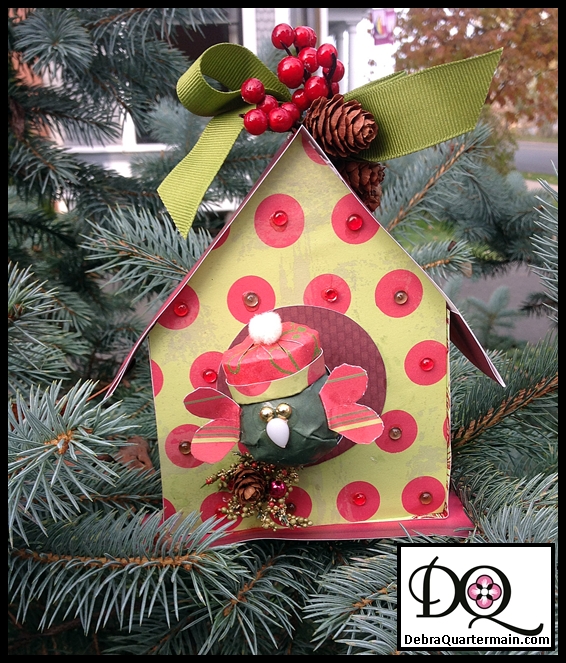
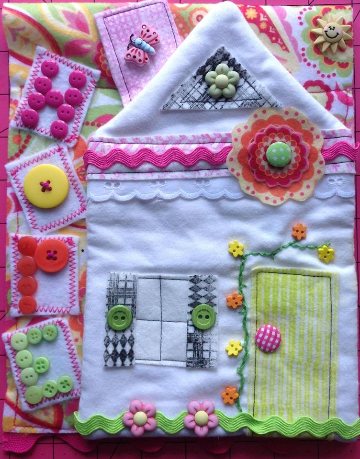
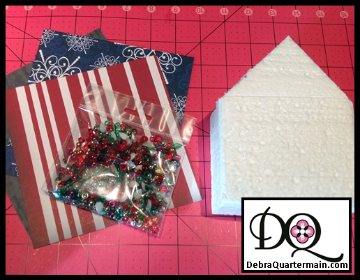
Holiday time and a special DCC blog hop featuring Robin’s Nest pretty papers, embellishments and Smoothfoam! I couldn’t resist, I love birds and in honor of the pairing on this hop, a holiday bird house with a wee birdie wearing my favorite hat, a tam! Smoothfoam makes an ideal ornament base, lightweight for hanging.
You will need:
2”x 4”x 8” block, 2” ball of SmoothFoam
2- 12” sheets from the Christmas Collection (polka dot and stripe patterns) The Robin’s Nest
1 package Jolly Dew Drops from The Robin’s Nest
½ yard of 1” Green Grossgrain ribbon
Berries, mini pinecones embellishments
Fabri-Tac™ by Beacon
4” Westcott Brand® Titanium Steel Scissors
(3” Circle template, cutting mat, measuring tape, ruler, knife, pencil, paper cutter)
- Measure down 2” from end of block, draw line across. Mark center point. Measure down another 2” on either side. Draw line from that mark to center point for roof line. Repeat for opposite side. Cut along these lines. Cut a slice off bottom of ball.
- Use house block as a template to place on wrong side of paper and draw a front and back. Cut house pieces from polka dot. From stripe cut two roof pieces 2 1/2” by 6”. Cut two stripe side pieces 2” by 6” and a third piece for bottom. Cut a 3” circle. For little birdie cut a 3” by 6” piece of paper for body and a 1” by 5” piece for hat. Cut two 1” heart shapes for wings
- Glue paper to front and back of house. Glue paper circle to center of house. Glue red and green drops into center of polka dots. Glue paper pieces to sides extending to cover bottom. Fold roof pieces under 1 ½”. Center roof pieces and glue meeting at roof point with folded ends extending beyond sides. Glue bottom piece extending ½” beyond front.
- Tie bow for top of house. Trim ends. Glue pinecones and berries to bow.
- Snip both sides of birdie paper piece ½” for body. Snip one side of hat ¼”. Round both pieces some by shaping in hand. Glue large piece over ball with flat side being back of bird. Slits will allow overlapping of paper to make a quite smooth front. Glue gold drops for eyes and a white dew drop for beak. Fold end of heart under ¼”.
- Fold unclipped end of hat up ¼”. Overlap ends and glue. Glue slit pieces overlapping into center of hat. Glue pompom to center of hat. Glue hat on head..
- Glue bird to front of circle. Add some berries, pinecones under bird.
The best thing about a blog hop is being able to just hop along and see lots of eye candy ornaments by talented designers guaranteed to spark some holiday creativity! Follow along at the Robin's Nest!
Monday, November 04 2013
 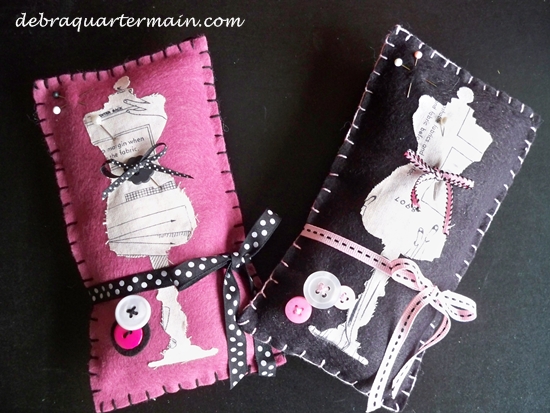
This month is all about Gratitude! My American friends celebrate their Thanksgiving and many are expressing their gratitude throughout the month. So as it is the first Monday of the month the Designer Crafts Connection is hopping with Thank you gifts as the theme.
As a sewer and someone who has worked with felt and fabric constantly, I am very grateful for my Big Shot and Sizzix dies where I can cut out many pieces quickly. I love the dress form die. These pin cushions are just two rectangle pieces of felt embellished with the dress form, buttons and ribbon. Quick and easy and a gift I often give as a thank you. I will be making some in Holiday colors as they will also make a cute tree ornament for sewer and quilter friends.
Gratitude, this month my heart is filled, I am getting married to a darling man, I celebrate a milestone birthday and this is the month my darling daughter finally arrived, a precious bundle at thirteen days old. Life is such a gift. So share in the season of the gifts of gratitude, follow the DCC blog hop with the button in the sidebar. Check out on the Smoothfoam blog the Handmade Holidays blog hop and the awesome giveaway which ends today!
Coming up on the 15th more Holiday creativity! We hop again with Smoothfoam and The Robin's Nest!
Ornaments make a great thank you gift, each year the recipient gets to enjoy the gift anew and be reminded of the spirit in which it was given! May you enjoy a month of creativity and gratitude! Love to hear what you are most grateful for! Debra
|